Welding is one of the tools you’ll use a lot in Cricut Design Space, along with Slice. The Welding tool allows you to attach or merge multiple images together to make a new single image. It even works with fonts. If you’ve ever used Illustrator, “weld” is the same as “unite”. It combines multiple images into one. So if you’re wondering how to weld in Design Space, keep reading, because we’ll show you some tips and tricks.
One thing not to be confused about is the Attach tool. The Weld tool turns multiple images into one, while Attach simply keeps the arrangement of the shapes on your mat.
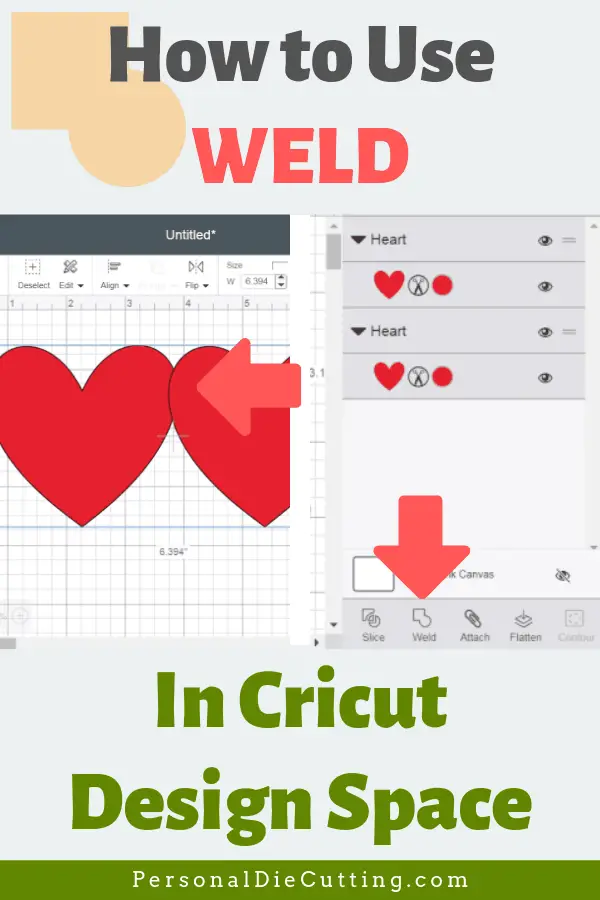
How to Weld in Cricut Design Space
Welding with your Cricut is fairly simple. The Cricut Design space is the same no matter if you have the Cricut Explore or the Cricut Maker machines.
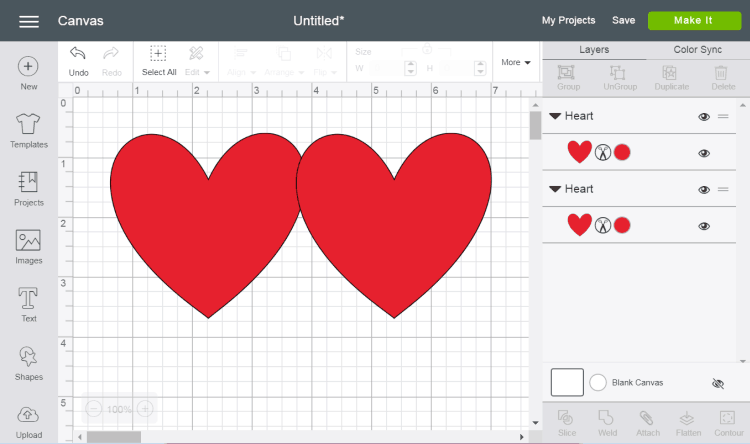
- The first thing you need to do is place your images so they are partially overlapping each other.

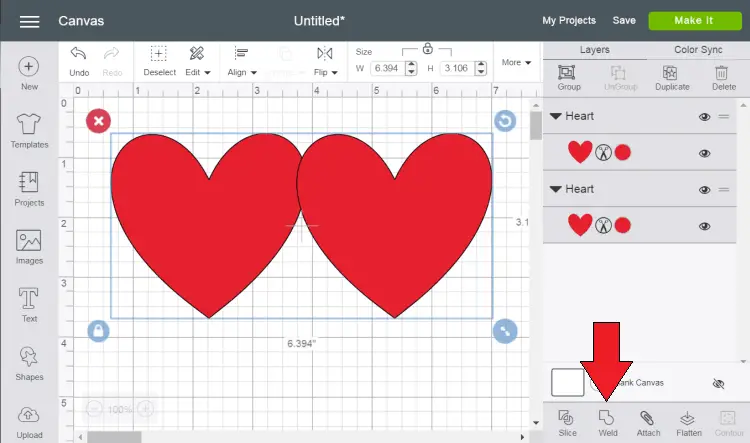
- Highlight the images.

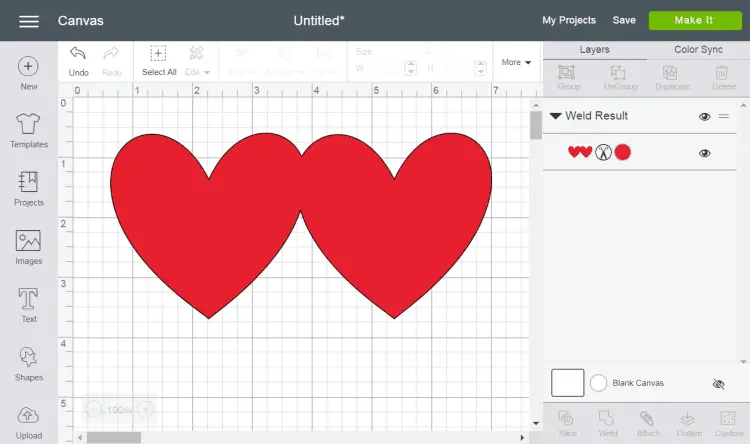
- Click the Weld button and that’s it!
Important! The thing to remember is after you weld shapes together and save your project, the weld cannot be undone.
How to Weld Fonts in Design Space
Learning to weld fonts in Cricut Design Space is just as easy. You just have to be careful to take into account a few considerations.
The best fonts to use for welding are script-style fonts. Script-style fonts are fonts that are often fluid that look like they were created by handwriting. Some fonts while beautiful are very thin and difficult to cut. Learn how to thicken a How To Thicken a Font for Cricut and Silhouette.
How to weld fonts:
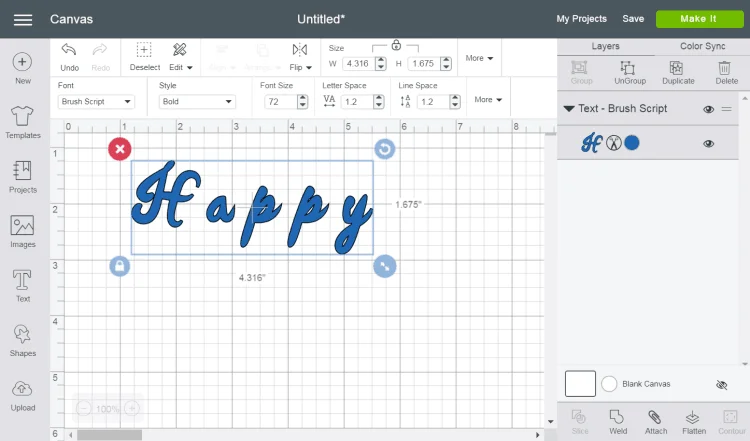
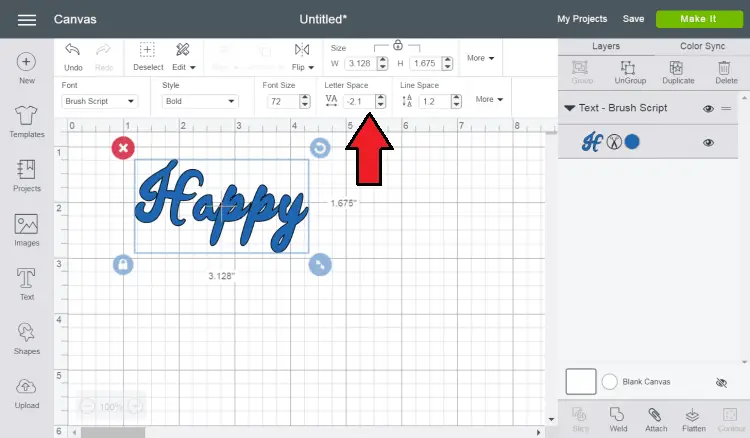
- Make sure all the letters are touching one another. This can be done by changing the font spacing, but it might not be the best option for all fonts. In this example, I lowered the font spacing to get most of the letters touching, but not the “H”. To solve this, I ungrouped the “H” and moved it so it’s overlapping the “a”.

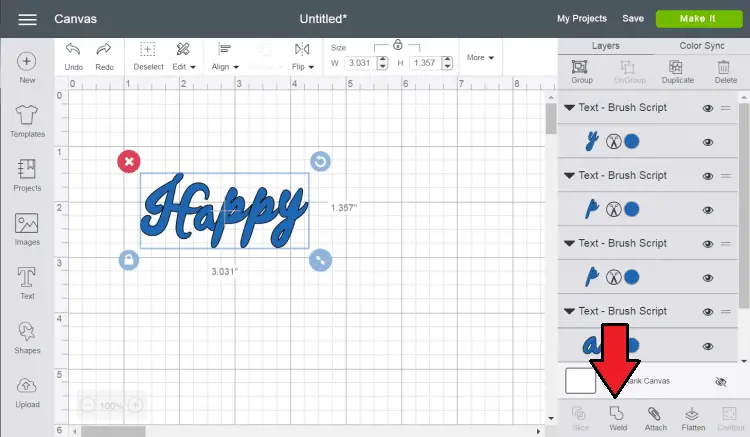
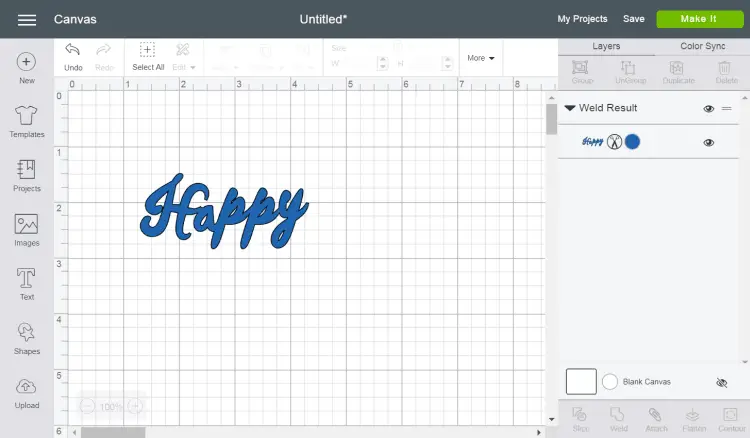
- The next step is to highlight all the letters and click weld. You’ll want to inspect each of the letters individually to make sure there are no cut lines between the letters. They should all be attached at some part of the letter.

Wrapping It Up
Welding is an important tool you’ll use a lot in Cricut Design Space. A few things to keep in mind:
- Welded images and fonts will be on the same layer
- Once you weld and save, welding cannot be undone
- Just because images or fonts/letters are touching does not mean they are welded
Do you have any welding tips? Let us know in the comments!