This post contains affiliate links.
The Attach Tool in Cricut Design Space is something that can be a little confusing at first. If you’re just getting started with your Cricut machine, you’re probably wondering what does the Attach button does, and what the difference is between Attach, Weld, and Group. In this article, we’ll explain how to use the Attach Tool in Design Space and tell you what the differences are between the other tools.
What Does the Attach Tool Do?
The Attach Tool has two functions.
First, it holds the arrangement of elements in place on your cutting mat exactly as they are on the design screen.
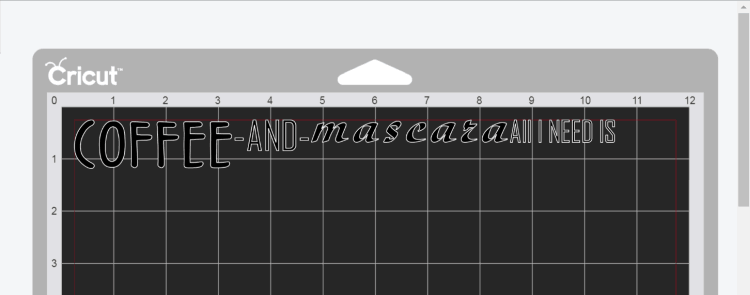
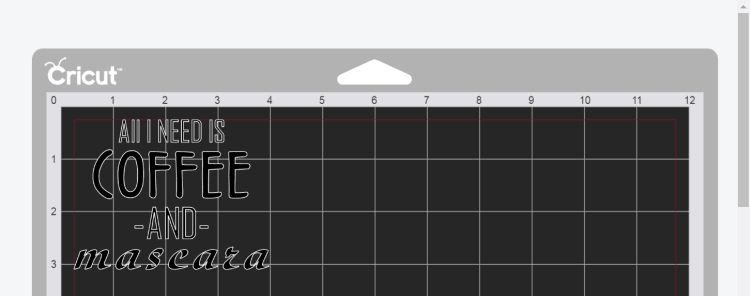
Normally, when you go to cut a project in Design Space and click ‘Make It’, Design Space rearranges your cuts so they are as close together as possible to save material. This is known as ‘paper saver mode’. This isn’t quite ideal because then you have to cut out the pieces and arrange them yourself, which is pretty annoying. What attaching does is ignores the paper saving feature and places your cuts exactly where you want them.
Sometime your design is rearranged for reasons other than not using the attach tool. Learn more in my article, Why Does Cricut Rearrange My Design?
This is how your cuts look not attached:
And this is how they look attached:
A good way to remember what the Attach feature does it by the paper clip icon. I like to imagine a paper clip attached to the shapes to prevent them from moving.
The second thing that Attach does is attaches a write or score line to a cut layer. A lot of people place text on a card where they want to write and wonder why the text keeps getting moved when they go to cut. Or they add a score line and wonder why the score line appears on a different mat. Attach fixes this.
How to Attach in Design Space
To hold cuts in place or to add write or score lines so they look exactly how you want, follow these steps:
- Place your images and text on the canvas as you want them.
- Select the layers you wish to attach together.
- Click the Attach button
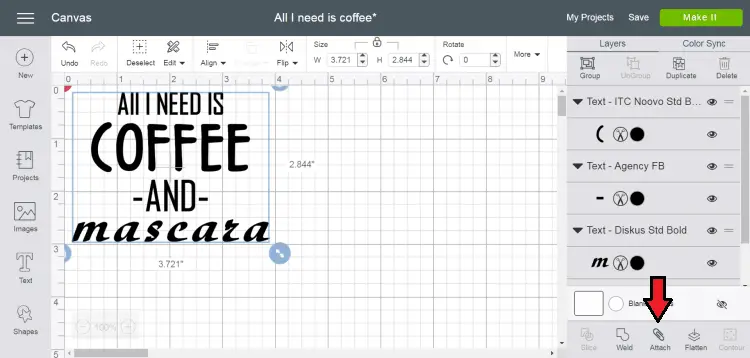
Unlike the Weld Tool, Attach can be undone by selecting Detach.
Keep in mind, if you attach multiple layers together, they will change to be the same color because they have to be on the same cutting mat.
Also, if you are attaching to an image that is grouped, be sure to ungroup it, otherwise you will attach it to the whole group.
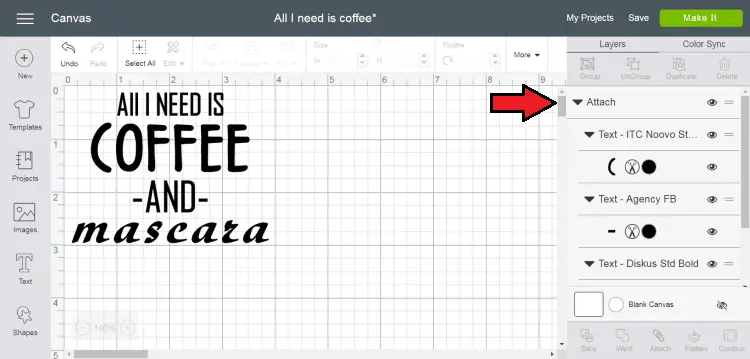
A good way to see what is attached is by looking at the Attach section in the Layers panel.
What Is the Difference Between Attach and Group?
We already talked about Attach, but what about Group? Group is a little more simple than Attach.
What Group does is allow you to move or resize the grouped images as a single unit. For example, if you wanted to resize a bunch of images at once, you could select all the images, group them, and resize them as if you were resizing a single image. This saves you time from having to resize each image individually. It also helps when you are moving around multiple images on the canvas.
When grouping images, it doesn’t affect how they appear on your cutting mat. It’s only there to help you design on the canvas.
To make it simple – Group is just for moving and resizing multiple items at once. It does not change layers or positioning on the mat.
Wrapping It Up
Attach in Design Space is something you will use a lot, especially for write and score lines. A few things to remember:
- Attaching to a layer will make both images the same color
- Remember to ungroup when attaching, unless you want the whole group attached
- Attach hold images in place, while Group simply makes them easier to select and resize.
To learn more about how to use Cricut Design Space check out my other articles
