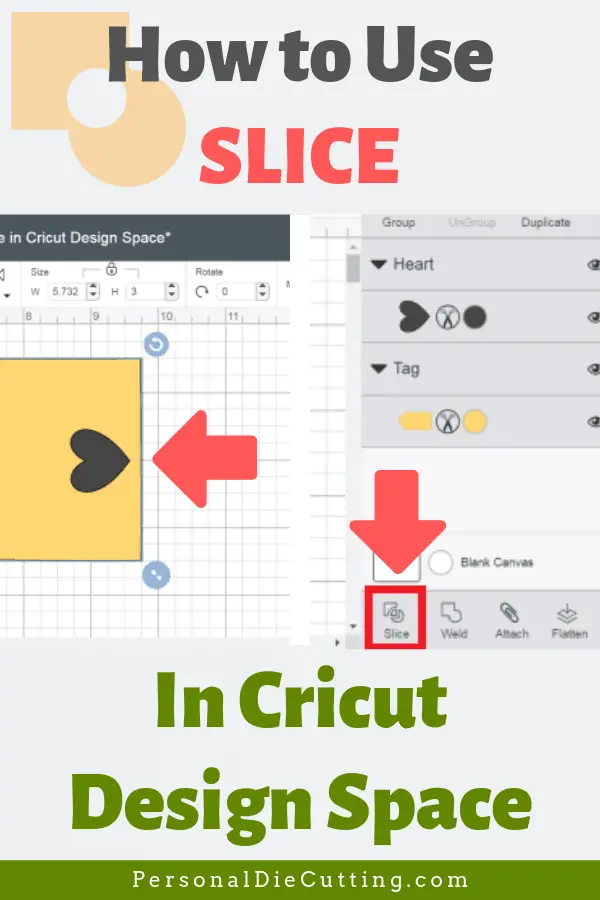
If you’re wondering how to Slice in Cricut Design Space, we’ve got you covered. We’ll explain everything step by step so you’ll be ready to go! We’ll also talk about some Slicing tricks you can do to crop your Cricut images and show you how you can cut images larger than your cutting mat.
What is Slicing?
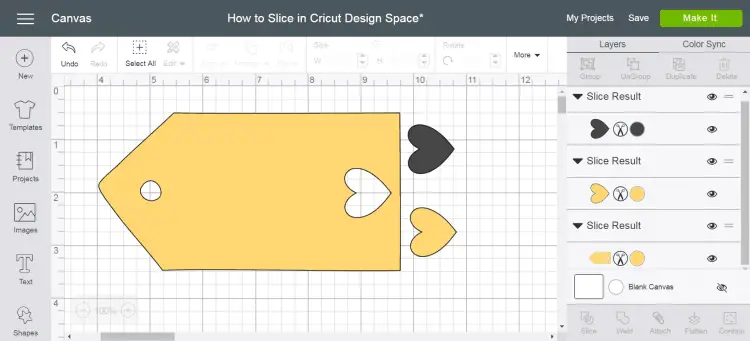
Slicing is cutting one image out of another image. It’s kind of the opposite of Weld. The way I like to visualize it is the top layer cutting through to the second layer, like a cookie cutter. This results in 3 or more new shapes. Whether you are using the Cricut Maker or the Cricut Explore, slicing in Design Space works the same way.
You can use Slice to:
- Cut a shape out of another shape
- Cut overlapping parts of shapes from one other
- Cut text out of a shape
Important things to know when Slicing:
- When Slicing images, you can only work with two layers at a time.
- When working with multilayered images, you’ll need to hide or ungroup the other layers to activate the Slice Tool.
- When Slicing with hidden layers, all the hidden layers will be removed from the design screen and the Layers panel. If you want to use those image layers with your project, be sure to ungroup before Slicing.
Cricut Sales! Save up to 50% OFF on Materials and Accessories. Plus, get up to $150 off Machines and Heat Presses!
Check Out the Current Deals
Get Free Shipping with Code JANSHIP
How to Slice in Cricut Design Space
Slicing is pretty easy and you can do some really cool stuff with it.
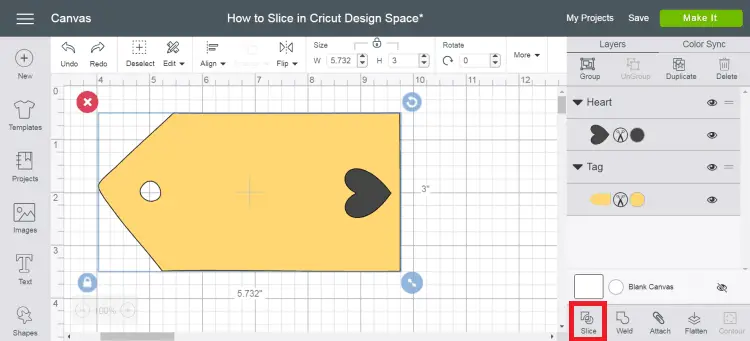
Here are the steps needed to Slice in Design Space:
- Arrange the images so they are overlapping in the way you want them cut.
- Select both the images.
On Windows: Select both images by holding the Shift or the Ctrl key and click each layer. iOS/Android: Select both images by tapping on the screen and dragging a selection box around both layers.
- Click Slice! You’ll see multiple shapes, which you can now use or delete.

Slicing Text in Design Space
Slicing text in design space is very similar, but there are a few things you need to be aware of.
Normally when slicing, you need to ungroup or hide the multilayered images. However, if the text is multilayered and one the layer is hidden, the slice Tool will still work. However, if you ungroup the text from its shadow, you have an additional image and can no longer slice, unless the text is ungrouped to individual letters.
Cropping Images
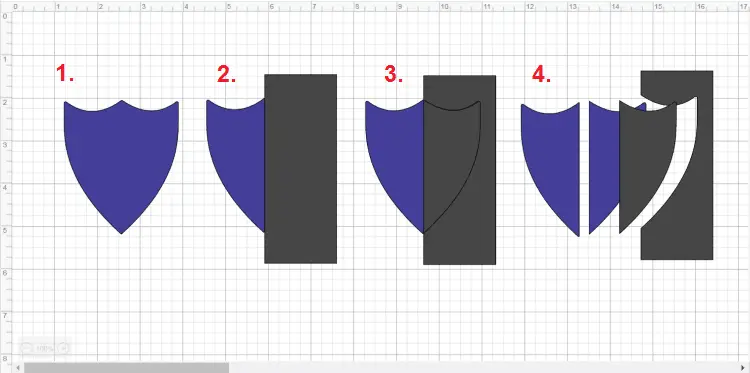
Cricut Design Space doesn’t have a crop tool specifically, but you can still crop using the Slice Tool.
How it works:
- Once your image is ready to be cropped, select add a new shape from the “Shapes” menu. Typically, I like to use the rectangle, but occasionally if I want a different shape cropped out, like a triangle shape at the end of a banner, I’ll select a different one.
- Place your shape over the area you want to crop.
- Select the images and Slice.
- You’ll be left with different parts, which can now be deleted.
Cutting Images into Multiple Pieces
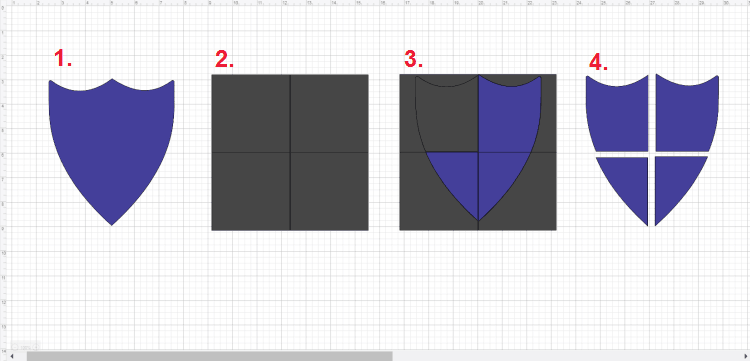
Another similar technique to cropping is cutting one image into multiple pieces. This can give projects an “explosion” technique where a single image is broken up into many different parts.
To do this, the process is basically the same as the cropping technique. You’ll want to use a shape for each piece you would like to cut. You can cove all the image all at once and Slice each piece. Keep in mind to only select two pieces at a time. You won’t be able to slice all the pats at once by highlighting them all.
Off-the-Mat Technique
The Off-the-Mat Technique is how you can cut images larger than your Cricut mat. Basically, you can slice images until multiple parts so that each part is able to fit on your 12×12 or 12×24″ mats.
Looking For More?
We hope you liked this tutorial on Slicing in Design Space. Remember, Cricut has some fantastic fonts and images for purchase and their Cricut Access subscription gives you tons of images and fonts for a low monthly fee.
If you have any tips below, feel free to comment and share this page!
