One of the most important tools for your digital die cutting machine is your cutting mat. Whether you use a Cricut or a Silhouette, you’ll need a cutting mat for most of your projects. These sticky mats can wear out, however, so how do you extend their shelf life?
To extend the life of a Cricut cutting mat, store your mat flat and clean it regularly. Use the recommended mat for the blade you’re using and the material you’re cutting (green for cardstock, pink for fabric). Also, you should rotate which part of the mat you cut on.
Cutting mats are a vital part of your cutting machine, but warped, curled, and dirty mats can also damage your machine. If you take care of them, they will give you great results again and again. Some projects don’t even need a cutting mat, learn When You Need a Cutting Mat in my detailed article.

How To Keep a Cricut Mat Sticky
New mats are very sticky, but you’ll notice that they start to lose their stick after a few uses. As you use your machine, you’ll develop your own preferences for how sticky you want your mats to be. However, if a cutting mat isn’t sticky at all, it won’t be very useful.
You want to touch your mat’s adhesive as little as possible. This is because the oil from your hands will get you mat dirty and can slowly break down the adhesive.
It’s also recommended to use different areas of your mats instead of the same spot all the time. This will help your mat wear more evenly.
How To Clean Your Mats
No matter how well you store and protect your mats, they will lose their tack at some point. Fibers and dust from the material you cut will get stuck to the adhesive layer, making it dull.
Running a lint roller over the mat can remove a lot of these fibers and renew the stickiness. Scraping the adhesive gently with a plastic scraper can also remove a lot of material.
If those tricks don’t work, you can try washing your mat with an alcohol-free baby wipe or in warm water with gentle dish soap. After wiping the mat, let it dry thoroughly before using it again. It will not regain full stickiness until it is dry, and running a wet mat through your machine will damage it.
I like using WaterWipes Unscented Baby Wipes from Amazon. They’re fragrance-free and contain only water and a little mild soap.
- MADE WITH BABY IN MIND: Crafted to gently clean and help protect premature, infant and newborn skin, these Sensitive+ Newborn & Baby Wipes have just two ingredients -...
- EVERYDAY USE ON SENSITIVE SKIN: When life plays dirty, WaterWipes plays it clean. Ideal for cleaning small messes and refreshing skin on-the-go, these disposable wipes...
- 3-IN-1 SKIN CARE BENEFITS: Made using minimal ingredients, our wipes have a neutral pH range, which helps protect the natural skin barrier.
Can You Add Adhesive To Make a Mat Sticky Again?
Eventually, no amount of washing will restore the stickiness of your mats. At this point, some crafters will change the adhesive on their mats.
Rubbing alcohol can remove the original adhesive from the mat, after which you could add a spray adhesive or other sticky tack to the mat. However, it is important to note that this will void your warranty and if something goes wrong and your home-made cutting mat damages your machine, you won’t be able to get support from Cricut or Silhouette.
To get a detailed tutorial on how to do this read my article 6 Ways to Clean and Restick a Cutting Mat.
Use the Right Cutting Mat for your Project
You want to make sure you’re using the right grip strength mat for the material you’re cutting. For example, thin paper like copy paper isn’t going to need as much grip as magnet sheets or cork.
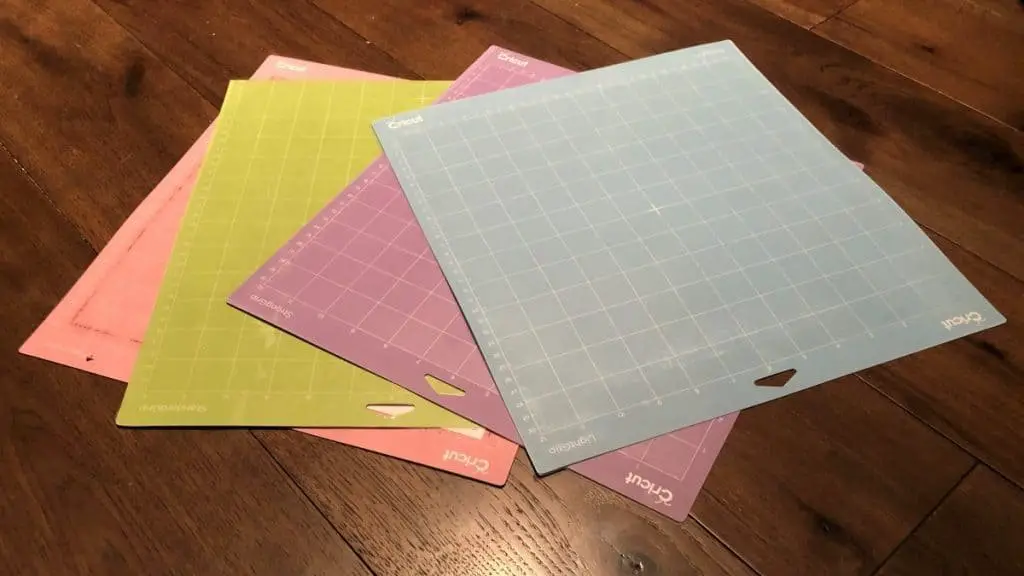
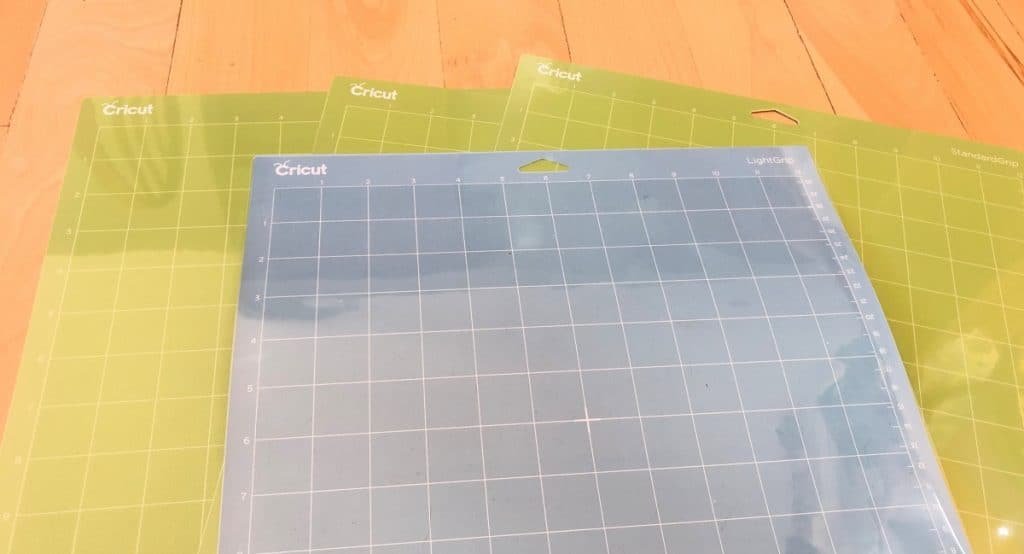
Cricut cutting mats come in a range of grip strengths. The company recommends different materials for each mat, and they are even color-coded for easy identification.
Their recommendations for mat/material pairings are:
- Green standardGrip mat: Cardstock, pattern paper, vinyl (heat transfer or adhesive)
- Blue lightGrip mat: Copy/printer paper, vellum, construction paper
- Purple strongGrip mat: Glitter cardstock, magnet sheets, leather, chipboard
- Pink fabricGrip mat: Fabric including bonded fabric, felt, and fleece
Different mats are also designed to withstand different cutting forces. The pink fabricGrip mat and the purple strongGrip mat are made of denser materials to withstand the higher forces from the rotary blade and the knife blade.
Most crafters use the green standardGrip mat for the majority of their projects because it is the most versatile. Some do prefer to use the blue lightGrip mat. I find I need to keep my mat very clean for my material to stick well or else burnish the material.

It is important to only use the pink fabricGrip mat for fabric. The adhesive is very light and specially designed to use with fabric. The mat is designed to be used with the rotary blade specifically.
The Silhouette cutting mat comes in a similar variety of strengths. Silhouette classifies their mats by tack level: light, standard, and strong tack. Silhouette does color code their mats too but not as obviously as Cricut.
The light tack mat has a bluish border, the standard tack mat has a white or translucent border and the strong tack mat has a grey border.
The Silhouette mats correspond to the Cricut mats–light grip to light tack, standard grip to standard tack, strong grip to strong tack–with the exception of fabric. Silhouette doesn’t have a separate fabric mat and recommends their strong tack mat for fabric projects.
How To Store Your Cutting Mats Safely
What you do with your mats when you aren’t using them is just as important as how you use them. Protecting the sticky surface when you aren’t using your mat will help preserve the stickiness.
Cutting mats come with a protective film covering the sticky side. Don’t throw this away after opening your mat! When you aren’t using your mat, put the film back over the adhesive to keep dust and debris from settling into it.
If you throw away that film, or if it gets damaged, you can substitute a sheet of parchment or baking paper. This will stick lightly to the adhesive to protect it but pull off easily without harming the adhesive when you’re ready to cut again.
How To Prevent Curling of Cricut Mats
You should always store your mats flat. Whether you hang them on the wall or place them flat on a table or shelf, you should never bend or curl them because this can cause irreversible damage to the mat.
Over time, the edges of your mat can start to curl up as well. This usually happens when your pressure is too high on the machine or your rollers are hitting the same grooves over and over again. Rotating which mat you use can help delay or prevent this.
If your mat arrives curled in the box, you can flatten it out by bending it in the opposite direction to the curve or laying it under a heavy book or object for a few hours. If this doesn’t remove the bend, you may need to contact the manufacturer for a refund or replacement. Using a curled mat won’t give you good results and could actually damage your machine.
Do Cutting Mats Wear Out?
Taking good care of your cutting mats will extend their shelf life, but even a long shelf life eventually ends. Most cutting mats will last you a ton of cuts, depending on what you’re cutting.
If you tend to always cut your designs in the same part of the mat, you can get a little more life out of your mat by switching which part of the mat you use. For example, if you tend to put your designs on the upper left corner, try using the lower right side to get a little more use.
When Should You Replace Your Cutting Mat?
So how long does a cutting mat last? If you use it every day, you will need to replace it sooner than someone who only uses their cutting machine once a month.
It’s time to replace your mat when materials no longer stick well and seem to be shifting during cutting. If washing it doesn’t renew the stickiness of your mat and improve your cuts it’s time to replace your mat. It should also be replaced if it gets cracked, bent, or otherwise damaged.
If you notice your cuts still aren’t as accurate or as crisp as you’d like your blade may need to be cleaned or replaced. I explain all about replacing your Cricut blade in my article, How long does a Cricut Blade Last.
If it’s time to replace your cutting mat you can get a large multi-pack from Cricut or check out Craft-e-Corner for bundles and sales on Cricut Mats and products. As always Amazon carries both Cricut brand mats, Silhouette brand and off-brand but I can’t speak to the quality of the non-name brand mats.
- Cutting mat, variant 3 pieces
- Brand: Cricut
- Dimensions: 30.5 x 30.5 cm
Can You Iron on a Cutting Mat?
If your mat curls up or gets warped, you may be tempted to try to fix it instead of throwing it away. If you can bend it back into shape by hand, that’s fine, but it may be a lost cause if that doesn’t work. Learn more about how to fix a warped cutting mat in my article, Why Your Cutting Mat is Warped and How to Fix It.
You shouldn’t iron sticky cutting mats the way you might a sewing cutting mat. While the heat from the iron would soften the plastic enough to re-shape the mat, if you heat the adhesive, it can melt off the mat and damage your iron, simultaneously ruining the mat! Learn more in my article Can You Iron On A Cutting Mat? For Cricut, Silhouette, And Self Healing Mats.
Final Thoughts
Cutting mats are a critical part of the Cricut and Silhouette processes, but they won’t last as long as your machine. With proper usage, the occasional wash, and proper storage, you can extend their usefulness for months at a time.


