To learn how to cut basswood with the Cricut Maker, there are a few things you’ll need to know. Here you will learn how to pick out the right kind of basswood, prepare it for cutting, and finally, how to cut the basswood.Let’s get started!
What Do I Need to Cut Basswood with the Cricut Maker?
Before you start, there a few things you need to make sure you have:
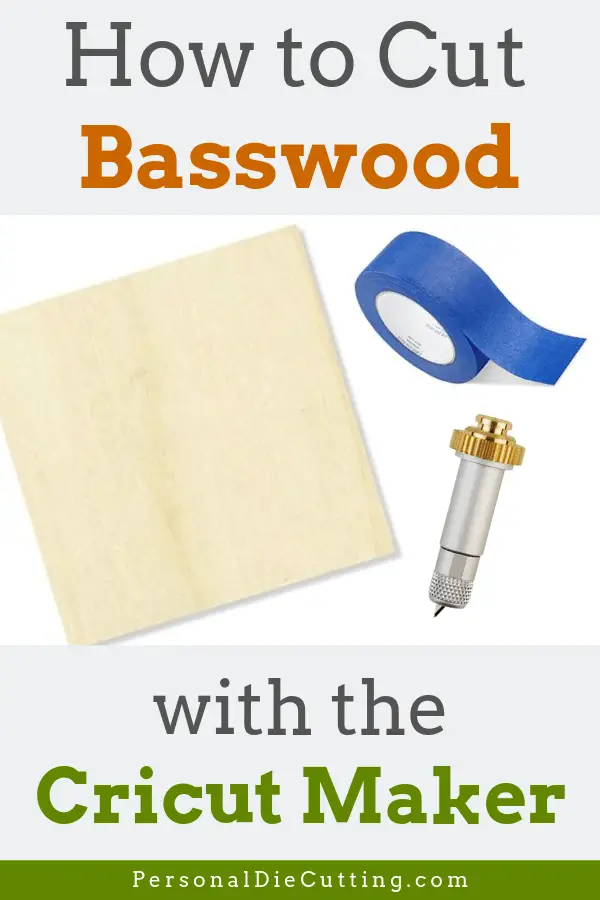
- Basswood
- StrongGrip Mat
- Knife Blade
- Masking tape or blue painter’s tape
- Compressed air or paint brush (optional – to clear debris)


Before you start cutting, be sure your knife blade is calibrated, see my full tutorial.
What Kind of Basswood Should I Buy for the Cricut Maker?
Basswood is a great wood for crafting, but there are still some things you need to look out for when buying the wood.
- Have a thickness of 1/32″ (0.79mm) or 1/16″ (1.59mm)
- Have minimal warps and bows.
- Be free of blemishes and knots. If the basswood does have knots, it should be avoided when cutting.
- Do not use composite pieces or pieces that contain glue. Glue is sometimes harder than the basswood itself and the knife blade may get caught and snag.
- If you’re creating projects with multiple pieces, consider getting pieces of basswood that are similar in color and appearance.
What Size Basswood Can I Cut with the Cricut Maker?
Here are Cricut’s recommendations for cutting sizes of basswood:
- The maximum cut size is 10.5″ x 11.5″ or 10.5″ x 23.5″ depending on the cutting mat.
- The minimum cut size is 0.75″ x 0.75″, which includes interior and exterior cuts.
- The width of cuts should not be smaller than the diameter of a pencil, otherwise, the wood might split across the grain.
- Make sure all cuts are at least 1/4″ away from the edge of chipboard. If the blade crosses the edge of the chipboard, the blade is likely to get damaged.
How to Prepare and Cut the Basswood
Unlike other material, there are some extra considerations when attaching basswood to Cricut mat. Follow the guide below to learn how to attach basswood to your Cricut mat:
- Basswood often comes in long sheets. If the basswood is larger than your project, the first step is to cut the basswood to the right size. Be careful handling the basswood as it can be fragile. Use a craft knife and ruler on a protected work surface to make multiple cuts.
- If there are any stickers or packaging on the basswood, remove them.
- Be sure the basswood is free of debris by wiping the material down with a cloth or used compress air to remove any dust or particles.
- Place your basswood on the StrongGrip mat. If the basswood has a curve, make sure the curve is facing downward. Once the basswood is on on the mat, lightly roll a brayer over the entire surface of the basswood. This will help create a stronger bond with the StrongGrip mat. If you have a longer piece, try placing it horizontally instead of vertically. This will prevent the material and mat from sagging.
- Once the basswood is on the mat, use masking or blue painter’s tape to tape the basswood to the mat. It’s recommended to tape all 4 edges with 1″ of the corner of the mat.
- Before you install the cutting mat, move white star wheels all the way to the right. If the star wheels are not moved, they may leave marks on the basswood. Also be sure that no part of the basswood goes under the rubber rollers. This could cause the machine to jam.
- Be sure that cuts are at least 1/4″ away from the edge from wood.
- Before you start cutting, mirror your image in Design Space. This will keep any marks left on the basswood on the back instead of the front.
As always, when cutting unfamiliar material, it’s best to make a test cut first before cutting your main project.
How Long Does It Take to Cut Basswood?
Cutting basswood will require multiple passes with the Knife blade, usually around 14-15 passes or even more. Before you start cutting, Design Space will let you know approximately how long the cut will take, and if the cut will take longer than usual.
If the basswood is not cut all the way through, you still have the option of doing additional passes. Press the green Cricut button the machine to cut an additional pass.
What to Do During Cutting
During cutting, it’s a good idea to keep an eye on how things are running. Particularly, be mindful of any debris that could get in the way. Another thing to watch out for are any small pieces that aren’t sticking to the mat anymore. If this happens, pause the machine and remove them.
What Happens If the Machine Get Stuck or Stops Cutting?
It’s possible your knife blade will run into a snag and get caught. This could happen because of pieces of dust or from a knot in the wood.
If this happens, the Go button the Cricut machine will start flashing and a notification will be displayed on the screen:
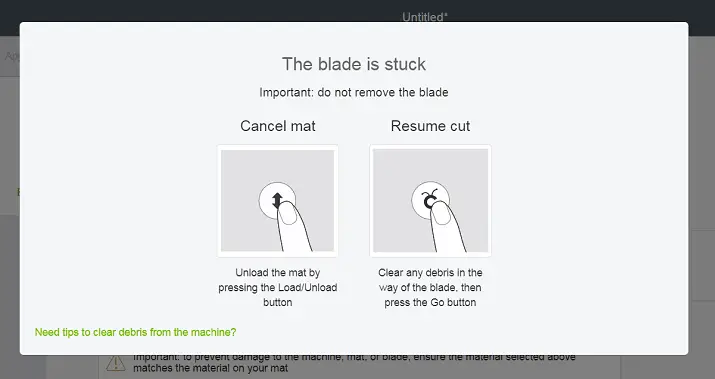
When this happens, it’s very important not to unload the mat! If you do, you’ll lose your project. Instead:
- Keep the mat and material in place!
- Use compressed air or a paintbrush to clear the area free from all debris and dust. Make sure the material, blades, and clamps are all clean before resuming
- Next, once everything is clean, press the flashing go button to resume cutting again. This could take a moment while the knife blade is being re-detected.
Removing the Cutting Mat
Removing the cutting mat and material after cutting is an important process. You don’t want to break your project. If your project is thin, be careful since it will be more delicate.
But, before you remove your material, you want to make sure the material is cut all the way through. If the material is not cut all the way through, press the Cricut button to add an additional cut.
- Make sure the material is cut all the way through.
- Carefully remove all the tape.
- Carefully peel the mat back opposite of the grain.
- Use a finger and slowly run it between the material and the mat an inch at a time until the material is removed entirely.
It’s possible that there may be pieces still intact. If this happens, flip it over and finish cutting the basswood with a knife. If you try to “pop” the pieces out, you’ll run the risk of breaking the project.
You may also notice knife impressions on the mat, this is normal! If you are cutting multiple pieces of the same design, try placing the material in different parts of the mat to make the mat last longer.
That’s it! Now you know how to cut basswood with the Cricut Maker!