The Cricut Maker comes with a variety of tools, including the knife blade. The knife blade opens up a lot of possibilities, including things like cutting through basswood. But, before you start, you’ll need to learn how to calibrate your knife blade for the Maker. This article will take you through all the steps needed to start cutting. Let’s get started!
When Do I Need to Calibrate My Cricut Knife Blade?
Typically you only need to calibrate the knife blade once. It’s actually the blade housing that is being calibrated, so when you replace the knife blade, the housing will stay calibrated. If you change blade housings or use the housing in a different machine, you will need to recalibrate it.
If you ever discover that you aren’t getting clean cuts as expected, recalibrating the knife blade again may help.
How to Calibrate Your Cricut Knife Blade
To Calibrate your Cricut Knife Blade:
- Open up design space. Open the menu and select ‘Calibration’.
- Select ‘Knife Blade’/
- Insert the Knife Blade into Clamp B. Add copy paper to the cutting mat. Select ‘Continue’/
- Insert the cutting mat into the Maker and press ‘Load’ on the machine.
- Press the Circut ‘Go’ button on the machine. The Maker will start cutting.
- Analyze which line cut is best and select the line in Design Space.
Before you get started, make sure make sure your machine is plugged in and the Knife Blade is inserted into Clamp B.
Step 1:
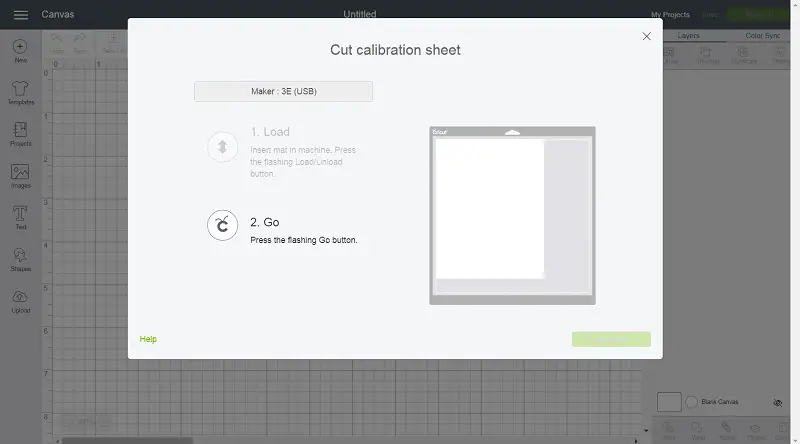
Inside Cricut Design Space, click on the menu and select ‘Calibration’. From here, follow the onscreen instructions.
Step 2:
Select Knife Blade.
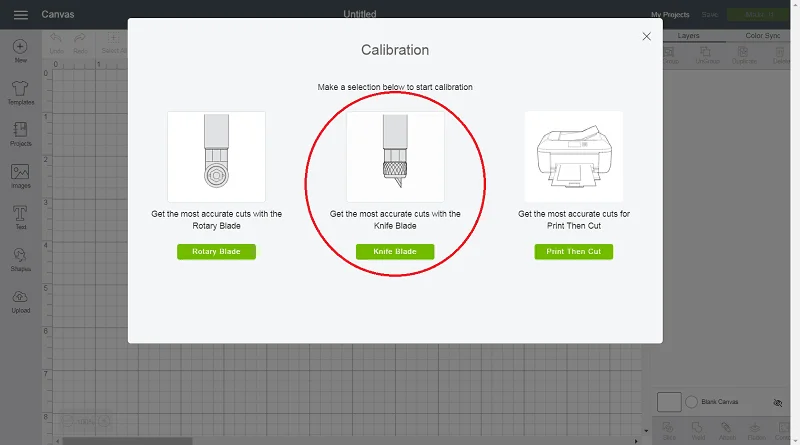
Step 3:
Double check that the Knife Blade is inserted into Clamp B and ready to go. Load a piece of copy paper in the top left corner of the light grip cutting mat, and click ‘Continue’.
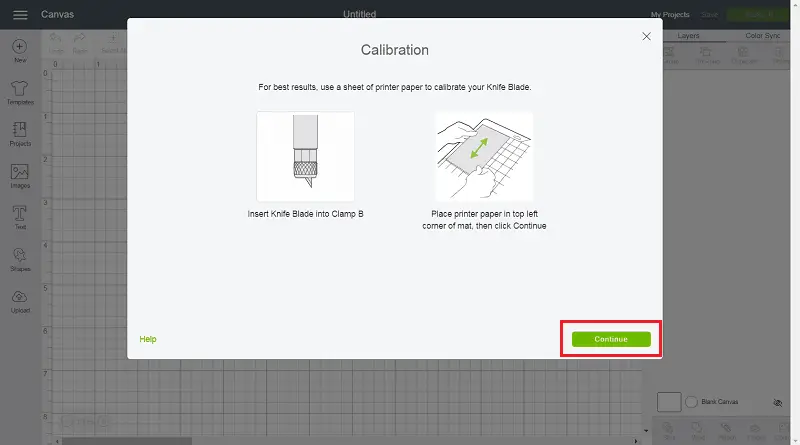
Step 4:
Insert the mat into the machine and press the flashing ‘Load/Unload’ button. Be sure the right machine is selected.
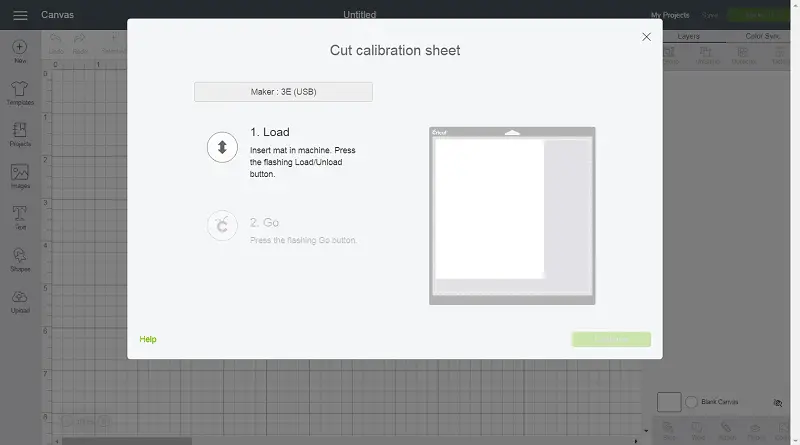
Step 5:
Press the Circut Go button on the Maker machine.
Step 6:
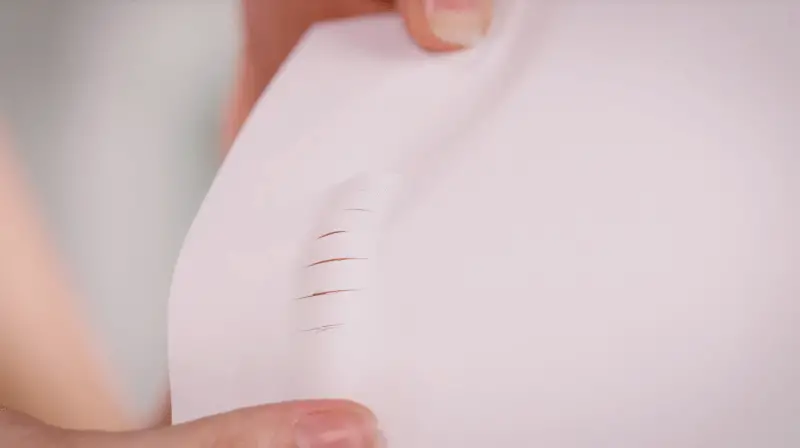
At this point, the Cricut Maker will cut several lines. These lines are composed of two cuts, one from the left and one from the right. When the Maker is done cutting, take the mat out. Inspect the cuts and find which one is cleanest. Remember to read the cuts from top to bottom. Once you discovered the cleanest cut, return to Design Space and select the appropriate line.
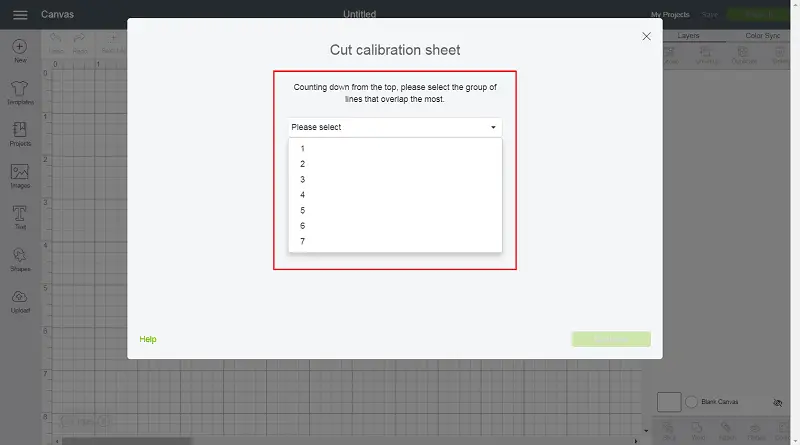
Then, hit continue! Your knife blade is now calibrated!