This post contains affiliate links.
If your Silhouette or Cricut mats are getting dirty or are no longer sticky, I will show you how to make your cutting mats like new. Knowing how to clean and resticking your cutting mats can save you money and it can also be fun.
Some cleaning methods may work better on different cutting mats, so try experimenting with different methods.
Some people claim that resticking your cutting mats will void the warranty – not exactly true! We’ve reached out to Cricut support to get the full details mentioned later in this article.
Cricut Sales! Save up to 50% OFF on Materials and Accessories. Plus, get up to $150 off Machines and Heat Presses!
Check Out the Current Deals
Get Free Shipping with Code JANSHIP
How to Clean Your Cutting Mat
The first step to restoring your cutting mat is to clean it. Cleaning may be all that you need to do. Once your cutting mat has been cleaned, it may be sticky again, so be sure to try these methods first.
There are a few different ways to clean your mat. Here are some of those ways:
- Wash with soapy water using a scrubby or a magic eraser. Afterward, air dry the mat.
- Use alcohol and bleach free baby wipes.
- Scotch tape or lint rollers
- Using adhesive remover like Goo Gone.
Let’s explore these different methods…
Tip: Not all machines and materials require a cutting mat. Learn more in my article The Cutting Mat: When You Need It and When You Don’t.
Cleaning a Cutting Mat with Soap and Water
This is the first method you should try since it’s the cheapest and easiest. This is also the cleaning method recommended by Cricut You might not even need to use soap for this method.
- Remove large debris with tweezers. Cricut remends not scraping as it may bury the debris into your mat making them harder to remove.
- Run the mat under lukewarm water. You may also place the water in a nearby bowl.
- Use a plastic, hard-bristled brush to gently scrub the mat in a circular motion. If you want to be extra careful, you can just use your hands.
- Pat dry with a paper towel and remove all the debris
- Let air dry for about 1-2 hours.
If your mats are messier, you can try soaps like Dawn soap to help.
Cleaning a Cutting Mat with Baby Wipes
Cleaning your Cricut mat with baby wipes is another easy and popular method. One crafter commented “I have tried dawn dish soap, awesome cleaner, and just scrubbing with baby wipes. It seems like scrubbing with baby wipes works the best and is the easiest”.
Most baby wipes should be fine. One Cricut owner also said she used Purell wipes, while another crafter said she used Clorox Wipes. Baby wipes might be better than cleaning your mat with Clorox wipes since baby wipes tend to be more chemical-free.
Using a Lint Roller on a Cutting Mat
Using a lint roller to clean your mat is another option, the sticky kind. This method can work great if you have a lot of loose debris that you want to remove, especially if you’ve been cutting fabric or felt. Using this method to clean your Cricut fabric mat might work best.
This method won’t really remove dirt and grease, so if you want a deeper clean, use one of the other methods.

- VALUE PACK - Total of 400 sheets. Includes 4 lint roller refills, 2 lint roller handles, and 1 protective covers. Each sticky roller refill contains 100 sheets.
- PROTECTIVE COVER - You will love the covers to be able to store them without having it stick to everything. Store it effortlessly after use.
- EXTRA STICKY LINT ROLLER FOR CLOTHES - Easily removable sheets save you time and energy when cleaning clothes, furniture, couches, carpet, bed linens, pillows, handbags,...
Cleaning a Cutting Mat with Goo Gone
To really get rid of tough build up, try Goo Gone. Drizzle a little bit of Goo Gone on your cutting mat and spread it around with a paper towel. Wait 15 minutes to let the goo settle. Afterward, use a scraper (an old credit card works well too) to get all the junk off. Wash it after to make sure all the goo is gone.
- Safely Restore Your Surfaces - The surface-safe formula removes the goo without harming your surface. Formulated with citrus cleaning agents and a pleasant citrus scent
- Trusted #1 Brand For Removing Gooey Messes – Try it on stickers, wax, markers, crayons, glue, tar, window decals, glitter, gum, labels and so much more
- Multiple Uses Around The House – Everything from wine glass label remover, scuff eraser, window sill cleaner, adhesive remover, tar cleaner, crayon drawing eraser, to...
Once your mat has been cleaned and dried, check the stickiness. If your mat is not sticky after it has been cleaned and dried, then you may want to restick your cutting mat.
DIY Cutting Mat Cleaning Methods
I’ve heard some people even use “homemade Goo Gone”. Here’s how it works:
- Mix together two tablespoons vegetable oil and three tablespoons baking soda into a paste in a small, sealable container.
- Use a spoon or knife to apply the paste to the mat
- Gently rub the paste into the mat and wash it off
This method is much more friendly as you don’t have to worry about chemicals and it smells much better than other products.
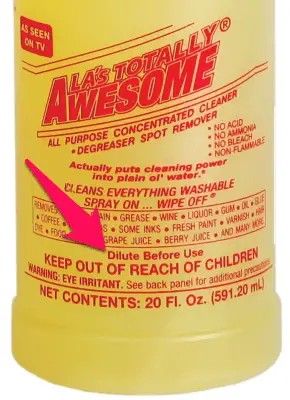
Using ‘Awesome Spray’ on a Cutting Mat
One product that lots of people talk about to clean their mats is Awesome Spray, commonly purchased from Amazon.
After talking to a lot of people about this, the reviews are mixed as to whether or not using Awesome Spray to clean your mats are a good idea.
Some people claim they have been using it for years with no problem, while others say it will strip the adhesive.
Here’s what some crafters had to say:
This does work, but so many people scrub/scrape too hard! Just take it easy and apply very little pressure on the first try, everyone!
The old mats with the flowers on them are sturdier for cleaners but many people have ruined mats from awesome with the newer mats.
One point of confusion is that Awesome Spray says you need to dilute before use. I know, it’s quite confusing since it comes in the spray bottle in the first place. Diluting the cleaner will also help prevent breathing in the harsh fumes.
But if you do feel comfortable using Awesome Spray to clean your mats, here’s one method to try:
How to Restick Your Cutting Mat
Before you restick your Cricut or Silhouette cutting mat, it’s important to tape around all the edges. This is to prevent any adhesive that is added from getting onto the edges, which may interfere with your machine’s rollers.
Once the edges of the mat are taped, use a spray adhesive or glue stick. Start with 1 coat. If the mat isn’t sticky enough after drying, apply another coat.
Here are some sticky mat adhesives you can try:
- 3M spray adhesive
- Krylon Easy Tack
- Quilt basting spray
- Bonding Memories Glue
- Elmer’s Repositionable glue stick
- Zigs Two Way Glue – wide tip


It’s important to let the glue dry first. If you don’t and apply the material to your cutting mat, your material may become stuck to the mat.
After the adhesive has dried, test the stickiness on a small area of the cutting with some material. If you find the cutting mat too sticky, pat your hands or a t-shirt on the mat to make it less sticky.
Using Contact Paper on a Cutting Mat
One trick you can use to keep your mats clean is to use contact paper. How does it work? You place a sheet of contact paper sticky side up on your cutting mat. The sticky cutting mat will hold the contact paper, while the contact paper holds your material.
Once your contact paper gets dirty, simply peel it off and replace it. This is especially handy when you are cutting fabric so you don’t get all the fuzzies stuck to your mat.
- Safeguards Your Privacy: Cover your front door, windows, glass kitchen cabinet, or bathroom with Con-Tact Brand's semi-transparent privacy film that will maintain your...
- Protect Any Surface with Clear Vinyl Roll: Whether you are shielding your shelves, cabinets, drawers, furniture, or any other surfaces, our BPA-free and non-damaging...
- Premium Vinyl Cover: Con-Tact Brand has been designing and manufacturing adhesive shelf liners and contact paper for over 40 years! Made with premium and highest-quality...
Does Resticking Your Cricut Mat Void the Warranty?
Some people claim that resticking your cutting mats will void the machine’s warranty. I’ve often heard it cited as “misuse and improper maintenance”. But is this actually true?
Well, I decided to go read the warranty info myself. I did find this little piece of info where the warranty is not covered:
Failure resulting from misuse (including but not limited to use beyond the Machine’s capacity or capability), use in a business or for commercial purposes, use with unauthorized software, accident, modification, unsuitable physical or operating environment, or improper maintenance by you.
So does resticking your cutting mat count as “misuse”? It probably does since it’s not authorized by Cricut. However, there’s a very important distinction here, and those are the word “resulting from”.
Resticking your Cricut cutting mat will not void the machine’s warranty unless it was the cause of failure. This means you can use restick cutting mats as long as they don’t cause issues with your machine. If you have a problem that was unrelated like hardware failure, your machine will still be under warranty.
I even reached out to a Cricut Support Specialist over chat and this is what they had to say:
Me: Hi there, will re-sticking the Cricut mat with an adhesive void the machine’s warranty?
Cricut: If you do and you get any adhesive inside the machine and causing any problems with cutting then it would void the warranty
Cricut: Basically if it causes the machine to get stuck or cause cutting problems it would void the warranty
Me: makes sense, thanks!
So yes, feel free to restick your cutting mats. Just be sure not to get the rollers, blade, or other parts of the machine sticky.
Other Cutting Mat Tips
Here are some more tips to get the most out of your cutting mats:
- Experiment with different kinds of mats. You may find some mats last longer than others and are less expensive.
- Save money by buying longer mats and cutting them in half.
- Don’t use nail polish remover. It contains acetone which will break down the cutting mat, which is made from PVC.
- Don’t use a hair dryer to dry your mat. The heat from the hair dryer has been known to warp the cutting mat. If you find your mat is warped, check out my article How to Fix a Warped Cutting Mat.
- Learn more how to care for your cutting mat and extend its life in my article, How To Care for Cutting Mats for a Longer Shelf Life.