
This post contains affiliate links.
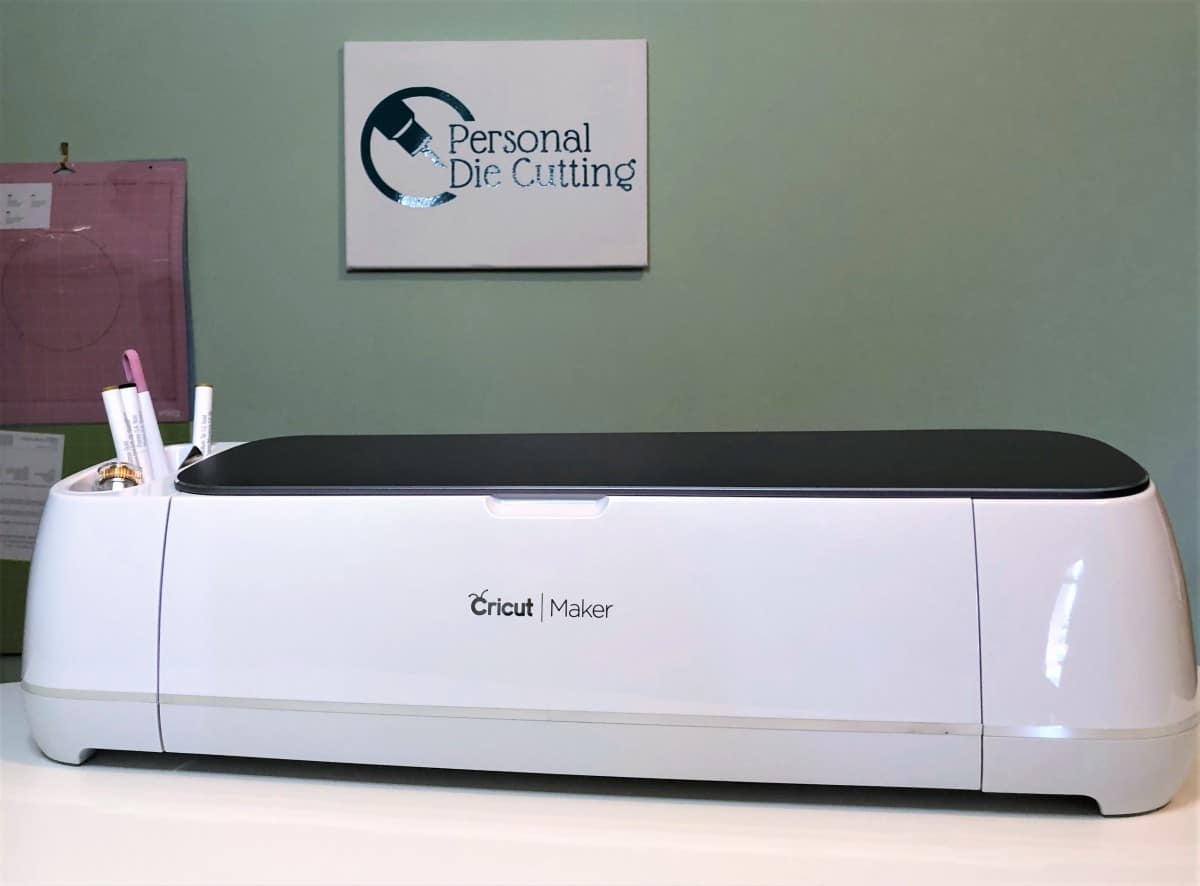
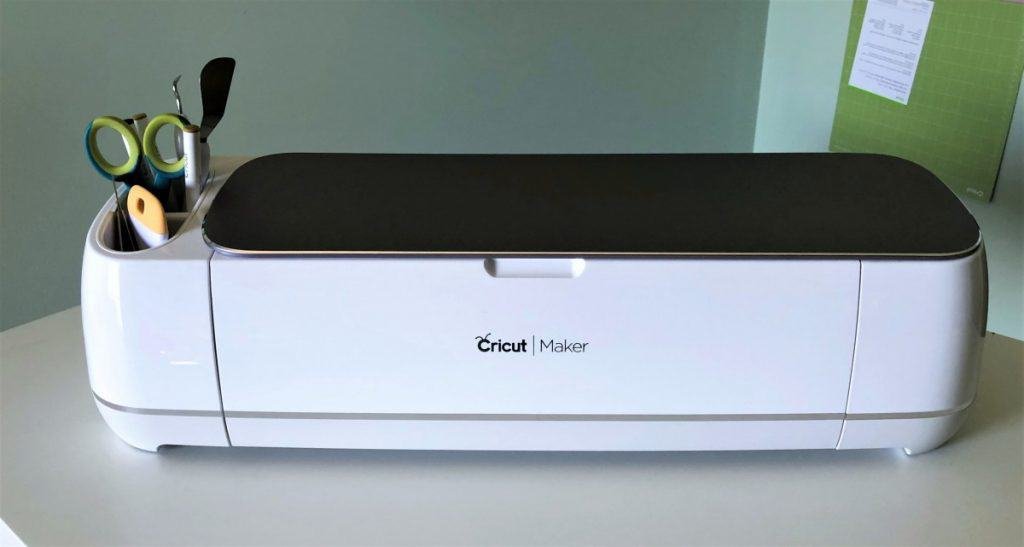
If you are in the market for a strong, extremely precise digital die cutting machine the Cricut Maker might just be the right machine for you. You might be looking for your very first machine, or switching from Silhouette or just up grading your existing Cricut Explore. The Maker opens up a new range of DIY possibilities, being able to cut delicate fabric to balsawood with power and precision.
In my review of the Cricut Maker, I’ll cover everything you need to know before buying this machine – including specs, features, pros, and cons.
Cricut Sales! Save up to 50% OFF on Materials and Accessories. Plus, get up to $150 off Machines and Heat Presses!
Check Out the Current Deals
Get Free Shipping with Code JANSHIP
An Overview of the Cricut Maker
Before I dive deeper into the review, introductions are due, especially for those just entering the world of die cutting machines. So what exactly is the Cricut Maker and how does it work?
Launched in 2017, the Cricut Maker is a die-cutting machine that enables you to cut a variety of materials and fabrics which, otherwise, wouldn’t be possible to cut using regular scissors or a precision knife.
This opens up a wide range of DIY projects and crafts possibilities, cutting everything from balsa wood and vinyl all the way to foam sheets and cardstock.
Even though the model is technically a few years old now, Cricut is continually upgrading and improving the tools that can be used with this machine, I’ll discuss this more in the tools section.
The Cricut Maker offers powerful performance with outstanding quality that many users consider this machine to be a best for fabric cutting. In fact, the Maker is Cricut’s flagship, superior to its Explore Air siblings in power, technology, and versatility.
The Maker machine is 10x stronger than the Cricut Explore Air 2 and uses a Knife Blade crafted for thicker materials, a Rotary Blade for use on fabrics without risk of tearing or fraying, and an Adaptive Tool System that automatically controls the blade direction and cutting pressure.
You can read my full comparison of the Explore Air 2 vs the Maker to learn more about the differences between these two machines. Its wide range of tools and precision and power make it one of the top die cut machines on the market.
As for how a digital die-cutting machine works, it consists of two parts: the machine itself as hardware and an app or computer program as software to control its operation.
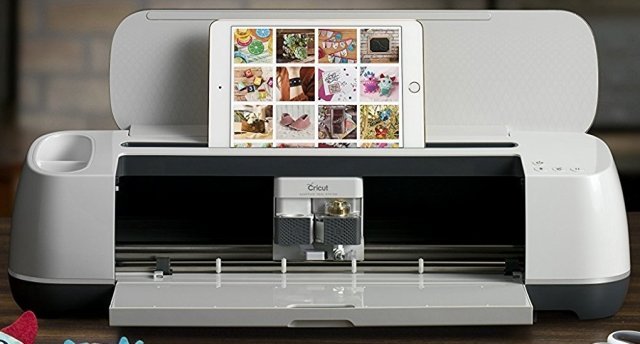
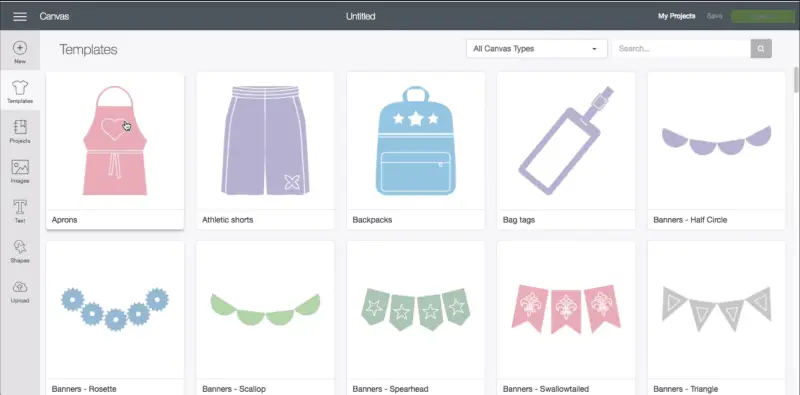
To use any Cricut cutting machine, you need to learn how to use Cricut Design Space so you can have the Cricut Maker working to its full potential. Design Space is the software that allows you to design, choose, and select the tools and materials required for your projects. Learn more about Design Space in my article.
Cricut Maker Specifications
There are some helpful stats to know about the Cricut Maker that can influence your decision about whether this is the right machine for you.
Specifications
- Size Closed: 22.5″ x 7 1/8″ x 6″
- Size Open: 22.5″ x 11″ x 10 7/16″
- Weight: 24 pounds
- Cutting Size: 11.5 X 23.5 inches
- Cutting Force: 4000 grams
- Maximum Thickness: 2.4 mm or 3/32″
- Compatible Software: Design Space
- Adhesive Cutting Mat: Required
- Built-In Images: Yes (In Design Space)
- Bluetooth Wireless Connectivity: Yes
Size and Weight
The Cricut Maker is by no means a light weight portable machine, for that, you’ll need to downsize to the Cricut Joy (read my detailed Joy Review Here). That being said the Maker is a full sized cutting machine meant to stay more or less stationary.
I will say I move mine around the house a little bit depending on which rooms that kids have taken over. But moving a 24 lbs, 2 foot brick a little easier than a 30 lbs squirming toddler.
When your machine is closed it has a footprint of 22 1/2″ by 7 1/8″. It’s about 6″ high as well when closed. But you’ll need more room when your machine is open and in use. I physically measured my Maker in both opened and closed positions so I could give you the correct measurements.
When your machine is fully opened and in use you’ll still need 22 1/2″ in length but now 11″ in width/depth plus you need about 10 inches of space behind the machine to allow for the mat to move in and out of the machine. You’ll also need 10 7/16″ above the machine.
Cutting Force, Cutting Width & Materials
The Cricut Makers cutting force is only surpassed by the Silhouette Cameo 4, you can read my full comparison of the Maker Vs Cameo 4 here. It has 4000 grams of cutting force vs the Cameo 4’s 5000 grams.
It also has a little over 10 times the cutting force of the Cricut Explore Air 2. Having such a high cutting force, in combination with all the tools available for the Cricut Maker means you have more the 300 different types of materials that can be cut.
Check out my article What can the Cricut Maker cut to see what materials are listed (though this list is growing as Cricut does more testing) as well as the blade required and how much cutting force is needed.
The cutting width of the Cricut Maker is limited by the cutting mat. The Cricut Maker does not have the ability to perform “matless” cutting like the Cricut Joy or the Silhouette Cameo 4.
Cricut Maker cutting mats come in two sizes 12″x12″ and 12″x24″. The material size that can be cut is limited to a maximum of 12″x24″ assuming you have one of the larger cutting mats.
That being said it’s important to note the largest size image/project that can actually be cut is limited further to 11.5″x23.5″ or 11.5″x11.5″ if you have the smaller mat. This is due to roller placement that feeds the mat into the machine.
Cricut Maker – Features
The Cricut Maker has a ton of different features that make it stand out from all the other die cutting machines on the market. In this section, I’ll cover the Adaptive Tool System, speed, storage, and some other cool features.
Adaptive Tool System
The Adaptive Tool System is probably the most impressive feature on the Cricut Maker. It adjusts the direction of the blade as well as the pressure and depth to match the material you’re cutting. This technology is essentially what makes the Cricut Maker far superior to other smart cutting machines.
This system works by you selecting the material in the Design Space software, the software then talks directly to the machine and sets the right pressure, depth, and direction of the blade or tool. Design Space will also tell you exactly what tool or blade should be installed in the machine.
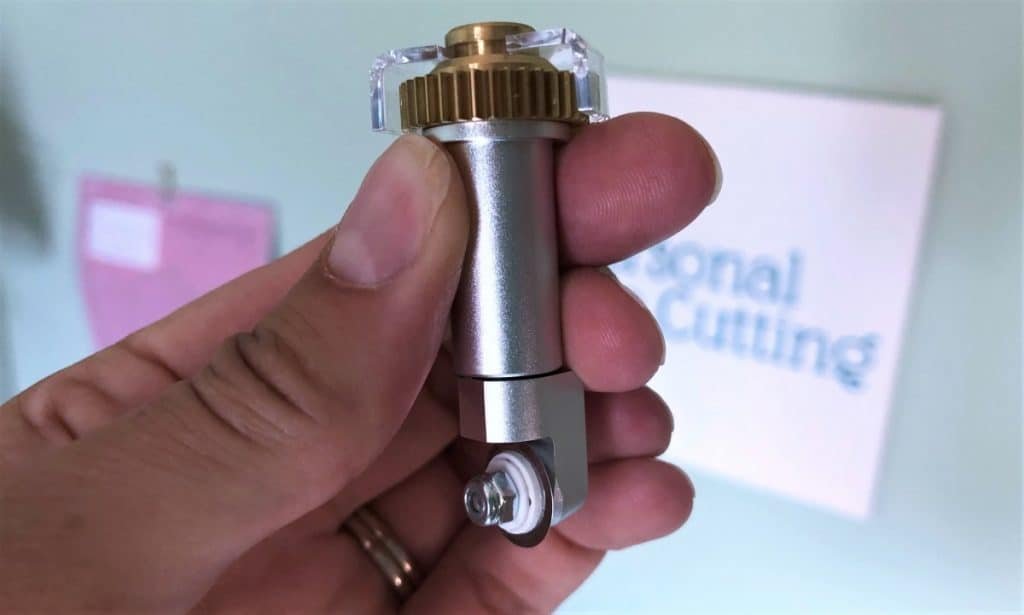
One reason the Cricut Maker has such a high level of precision and accuracy is due to the gears that control some of the blades and tools. If you look closely at the blades and tools specific to the Maker, you’ll notice that they have a golden gear on top. These parts make for a system called the “Drive Housing” where the Adaptive Tool System will drive (spin) the blade when you install it in your machine.
Not only does this guarantee that you’ll get the right cut every time, but it also allows the Knife and Rotary Blade to achieve much cleaner cuts.
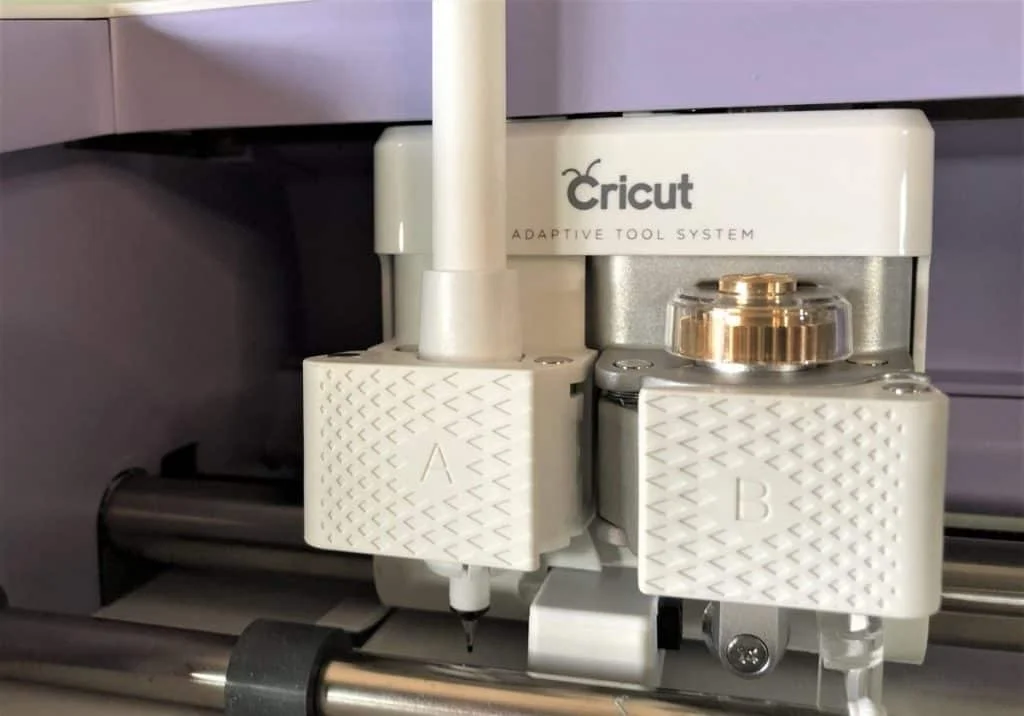
Two-Tool Capacity
Similar to the Cricut Explore Air 2, and Silhouette Cameo 4, the Cricut Maker comes with dual tool carriage. The fact that it has dual tool carriages makes a huge difference when it comes to how easy and fast you can finish a project compared to working with a machine that can only accommodate one tool at a time.
The double tool carriage allows you to draw or score projects, then cut them right after, all in one go. You’d be suprised at how much faster a project goes when you don’t need to swap tools all the time.
In the Cricut Maker, the first tool compartment is labeled ‘A’ (think “accessory”). It’s designed to accommodate the writing tools and scoring stylus. It also includes a pre-installed accessory adapter that allows your tools to smoothly fit in.
The second tool compartment, labeled ‘B’ (think “blade”), is meant to house the blades and any of the tools that are use the quick swap housing.
There is a down side to double tool carriage. If you have a project that cuts AND uses and of the tools that are part of the quick swap housing, like the scoring wheel or engraving tip, then you will need to swap tools when prompted by Design Space. But it’s a small price to pay for all the amazing tools available with the Maker.
Fast Mode vs Normal/Precise Mode
Fast mode is a Cricut Maker setting that allows the machine to cut 2x faster than previous Cricut machines. This mode is best used when cutting simple shapes that don’t involve a lot of details such as squares, rectangles, stars, and hearts.
If you try cutting in Fast mode but produce cuts that aren’t as precise as you want, you can turn it off and go back to using normal mode.
There are a couple of things to keep in mind though regarding the Fast mode:
- First, using this mode is only available for cutting specific materials, namely vinyl, cardstock, and iron-on.
- Second, you should expect the machine to be extra noisy when you cut in Fast mode.
Normal or Precise mode is exactly what it sounds like; a setting has the Maker cut at standard speed to let you achieve more precise and clean results. I consider it to be a default mode that’s ideal for beginners to work with as they build up their skill level.
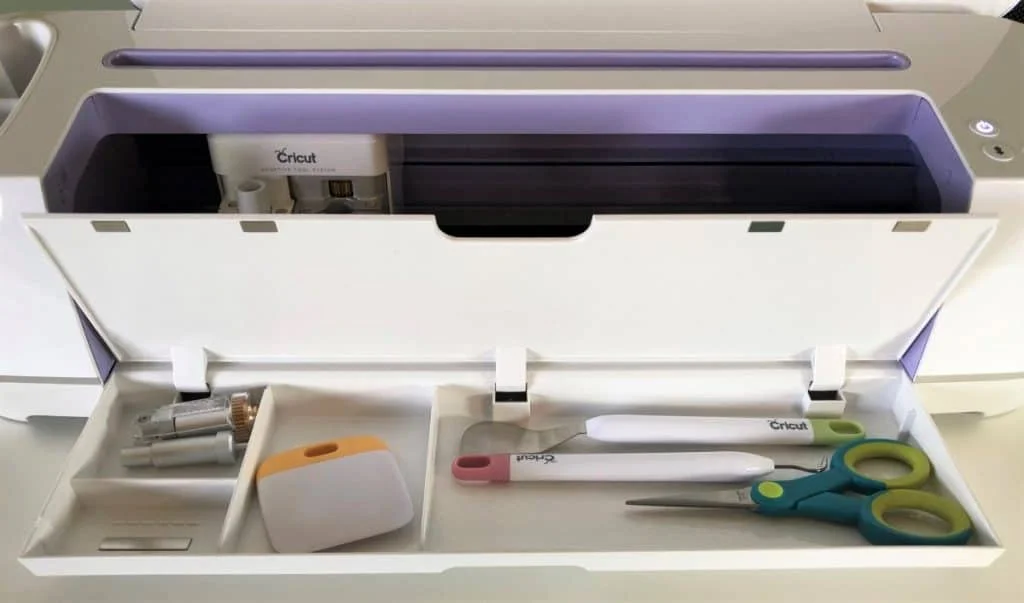
Extra Storage Space
The Maker has a surprising amount of storage space – more than what meets the eye. The most accessible storage compartments are the storage pockets on the side of the machine. There are two pockets, both of which are padded with silicone rubber to protect your blades and prevent them from chipping.
The top pocket is larger and deeper which makes it great for holding bigger tools such as styluses, pens, and picks. The bottom pocket is smaller and more shallow, so it’s better suited to hold drive housings.
Another storage compartment is found inside the front lid. There are 3 main sections:
- The largest section provides enough space to keep Cricut tools such as scissors and spatulas.
- The middle section is perfectly sized to fit the scrapper.
- The last section is divided into two compartments. The top one is meant to store gear housings (make sure you keep them flat side down for a nice fit), while the bottom compartment is equipped with a magnet to hold extra blades.
If you aren’t sure what tools you should buy with your Cricut Maker, check out my article the 10 Must Have Tools for Your Cricut.
Print Then Cut
Most full sized digital die cutting machines feature Print Then Cut. This allows you to print a picture or image using your home printer then cut them out with your Maker.
What makes the Maker standout from previous machines is the enhanced sensor. This means it is not limited to using only light colored materials. You can use medium colored or even patterned materials.
There are some limitations to the “Print Then Cut”. It can only cut images up to 9.25″ x 6.75″. And as I mentioned you will need a printer. Find out what the Best Vinyl Sticker Printer is to pair with your Cricut Maker.
Wireless Connectivity
One more feature that really boosts the convenience aspect of the Cricut Maker is the Bluetooth technology that lets the machine connect wirelessly to your device. This means you’ll be able to connect the Maker to your computer, phone, or tablet without having to deal with the hassle of extra wires.
I love this feature since my laptop is limited on USB ports, a trend becoming more common with new thin laptops.
If you aren’t a fan of Bluetooth or are cutting out a project that will take a long time then you also have the option of connecting via USB.
Cricut Maker – Blades
Blades are the tools that actually perform the cutting of materials, and not all blades are capable of cutting through the same materials. The more blades available for you die cutting machine the more options you will have for what materials you can cut.
Luckily, the Cricut Maker is all about versatility and personalization. This machine is compatible with all of the Cricut Explore and Cricut Maker blades available on the market, which explains its ability to cut a wide range of materials. It is not compatible with Cricut Joy blades,
The following is a breakdown of the blades that you can use with the Cricut Maker.
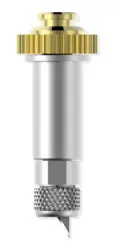
Fine Point Blade

The Fine Point blade is the blade that you’ll be using a lot with the Cricut Maker. It comes standard with the machine and used by both the Explore Air and Maker.
It’s the “general purpose” jack of all trades blade. It is capable of cutting through thin to medium-weight materials with outstanding stability and precision
This premium blade is made out of German carbide, which is a durable material that allows the blade to endure wear and tear for extended periods. This means you get to cut projects for more hours than other blades could offer.
When your blade starts getting dull and not cutting well you get replacement blades in a multi-pack of 5 or 10.
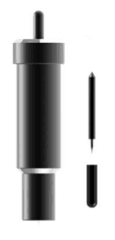
Rotary Blade
The Rotary Blade is one of the most popular and highly recommended tools to use with the Cricut Maker. It’s also one of my favorites. And fortunately is included with your machine.
The Rotary Blade gives you the ability to cut fabric without a backing material. It can work with almost any fabric, including less dense materials (such as cork) and delicate fabrics (such as tulle).
This blade is only compatible with the Maker due to the unique geared drive housing. This allows you to enjoy more precise results thanks to its rolling action and gliding abilities much like a rotary cutter vs scissors.
That being said, the Rotary blade is best used with design ¾ inches or larger. If you try using it with smaller designs, you’ll be risking gouging the mat and dulling the blade quicker as the blade scrapes during tiny turns.
The Rotary blade is designed to cut materials using the pink FabricGrip mat because it’s made out of a stronger material that’s able to withstand the pressure generated by the Maker while cutting and has a special adhesive that releases the fabric easily.
Cricut sells blade replacement kits for the Rotary Blade and they have been well designed so never need to touch the blade itself during replacemnt.
Knife Blade
If you’re planning to cut through thicker materials such as chipboard, matboard, or even balsa wood, then you need the Knife Blade to get the job done. After all, this is the strongest of all the blades compatible with the Cricut Maker. Unfortunately, it is sold separately but you can buy one at Cricut.com.
The Knife blade is pretty much every designer’s dream come true thanks to its ability to cut through materials as thick as 3/32 inches (2.4 mm). In general, you should use the purple StrongGrip mat when using the Knife blade.
Similar to the Rotary blade, cutting shapes smaller than ¾ inches is generally not recommended. The cutting width shouldn’t be less than a pencil’s thickness, otherwise, the material is more likely to break apart during the cutting process.
One tip when cutting thicker materials is to be sure to move the white rings on the roller bar to the far side. These roller bars are designed to hold materials in place, but for thicker materials, they aren’t needed and can leave marks.
When the time comes to replace your blade you can pick up a knife blade replacement kit from Cricut.
Deep Point Blade
Compared to the Fine Point Blade, the Deep Point Blade (or Deep Cut blade) comes with a steeper cutting angle of 60 degrees as opposed to the regular 45-degree angle. This is why the Deep Point Blade can cut through thicker materials.
This blade is also black color-coated and made from durable steel with a custom-made housing. This blade was originally made for the Cricut Explore line of machines but it is compatible with the Maker.
BUT in general, you will get cleaner more precise cuts from the Knife blade vs the Deep Point blade. On the list of materials the Maker can cut there are only about 13 that recommend the Deep Point blade for the Cricut Maker.
The Deep Point Blade is sold separately and can be found on the Cricut website. You can also purchase replacement blades in a 2 pack from Cricut.
Bonded Fabric Blade
The Bonded Fabric Blade is more or less the same as the Fine Point blade aside from being pink in color. This was done so you will only use the blade for cutting fabric, much like having designated fabric scissors.
Having a blade dedicated only for fabric means it’ll last longer and remain as sharp as possible when you need to cut. You shouldn’t use the Bonded Fabric blade with materials that can compromise its cutting performance such as paper and vinyl.
Again this blade was originally designed for the Explore line of machines and while it is compatible with the Maker you likely won’t use it much thanks to the Rotary blade. Cutting fabric with the Bonded Fabric blade requires you to bond the fabric to a backing material.
If you want to cut fabric with a bonded backing material, then this is a great blade to have on hand. Otherwise your included Rotary blade will cover you for most projects.
The Bonded Fabric blade is sold separately and available on the Cricut website.
Cricut Maker – QuickSwap Tools
The QuickSwap tools are a series of different tools and blades that use the same Drive Housing. You can easily switch between unique tools or blades with the push of a button.
By using the same housing the cost of the different tools available for the Maker comes down a lot! Cricut is contantly developing new tools and blades to use the QuickSwap housing. Many of these have only recently been released and I’m hoping they have some more cool ideas up there sleeves.
At the time of this review, there were 6 different tools compatible with the quick swap housing. This housing uses the same gear system unique to the Maker so they are only compatible with the Maker machine.
The QuickSwap Housing is sold separately from your machine but can be purchased on its own, with a single tool or in a multi-tool bundle all from the Cricut website.
Scoring Wheel – Single and Double
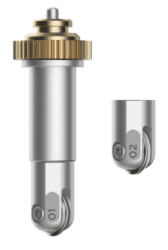
The Scoring Wheel allows you to create beautiful creases free of cracks that often appear when you try to fold materials by hand. The Scoring Wheel delivers 10× more pressure than the Scoring Stylus, making it rather easy to fold materials, especially harder ones.
There are actually two scoring wheels available the Single Scoring Wheel and the Double Scoring Wheel. These two wheels are labeled 01 and 02 respectively.
The Single Scoring wheel works best for regular paper and regular cardstock. And the Double Scoring Wheel creates two parallel score lines – ideal for thicker materials such as poster board and cardboard.
The Scoring Wheels can be used on any mat. The mat you use will depend on the material. When you are using the Scoring Wheel, it’s best to have the “pretty side” of your material down.
You can purchase the Scoring Wheels from the Cricut website in either a combo pack which includes both the double and single wheel as well as the QuickSwap Housing or just the Single Scoring Wheel or just the Double Scoring Wheel. Both are available with or without the QuickSwap Housing.
Debossing Tip – Fine
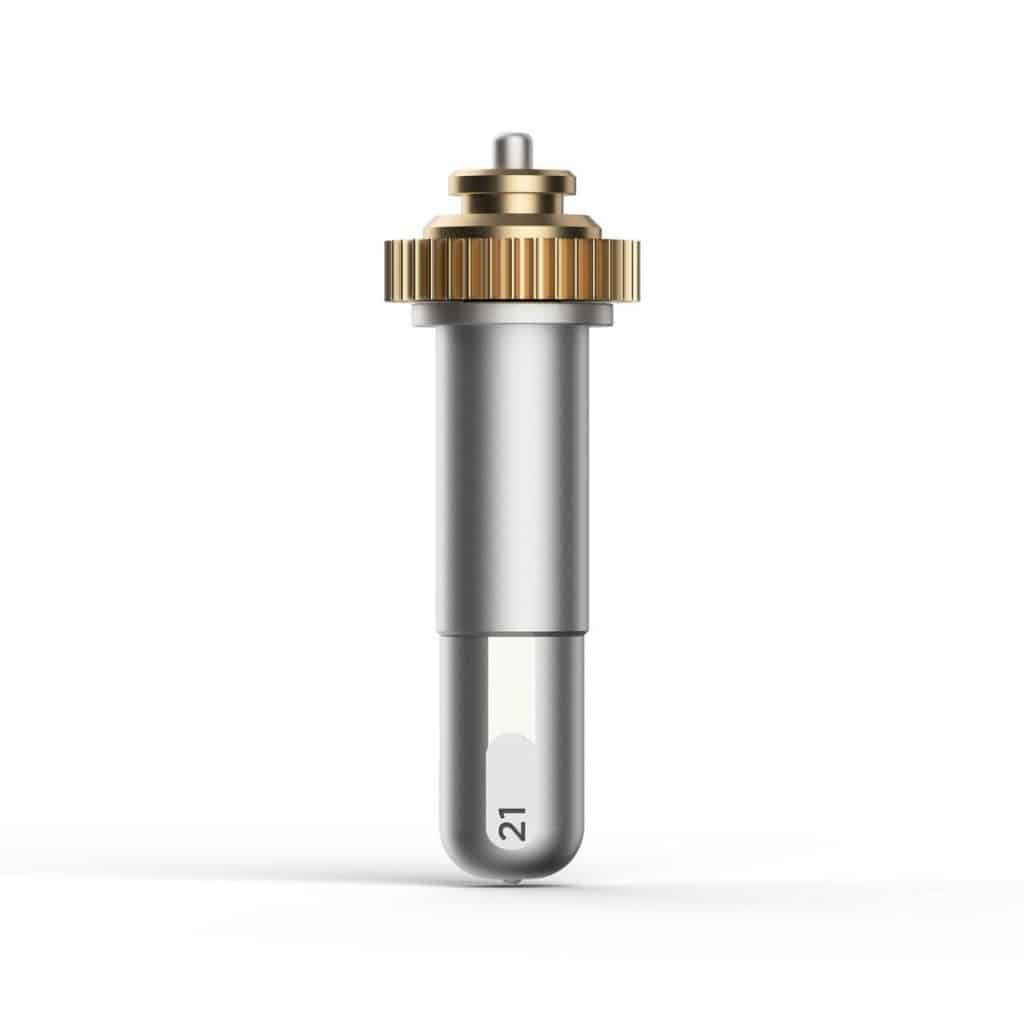
The Debossing Tip pushes your design into your material using a 2mm ceramic roller ball. It’s the opposite of dry embossing which leaves a raised surface and is difficult to achieve with a digital die cutting machine.
It gives you the ability to add an indented design to your project and as with all Maker projects the sky’s the limit for what you can deboss into your material.
As for what materials are compatible generally paper products, like cardstock and chipboard, as well as leather, both faux and tooling, are great options for debossing. You can see what materials Cricut has specifically tested here.
The Debossing Tip is labeled with a 21 on the side. It is also called “Fine” with 2mm roller ball this leads me and others in the crafting community to assume that Cricut will release other sizes of Debossing Tips in the future.
The Debossing Tips is available on the Cricut website and can be purchased as just the Debossing Tip or with the QuickSwap Housing included.
Engraving Tip
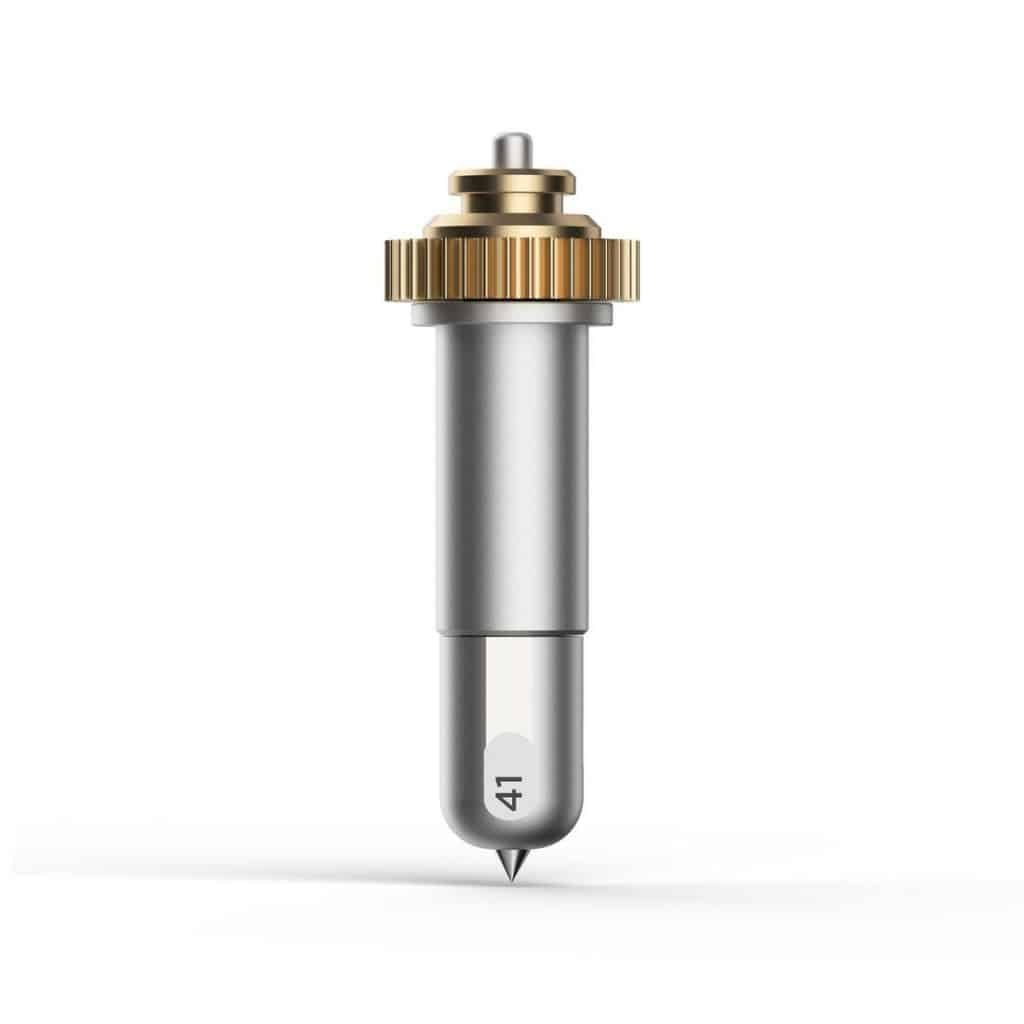
The Engraving Tip etches your design into your material allowing you to create a wide range of unique projects like dog tags and personalized jewelry. It is made of German Carbide Steel and is extremely sharp. It is labeled with a 41 on the side.
This tool has me super excited for all the different personalized projects that will last so much longer than vinyl based projects. There are quite a few different materials Cricut has tested with this tip including aluminum sheets and leather, see the full list here.
There are a few tips Cricut has mentioned to help get the best results from your engraving project. It is highly recommended to tape your material down to your mat on all sides and to not tape over the area to be engraved.
Also once engraving is completed, depending on your material, there may be burs and material bits left behind that are sharp. Use tape or a sticky lint roller to pick up the bits instead of your hand as they may be sharp.
You can also use a polishing cloth of very fine sandpaper to smooth the edges. Just double check your material won’t be scratched or damaged by testing on scrap or the back of your project.
The Engraving Tips is available on the Cricut website and can be purchased as just the Engraving Tip or with the QuickSwap Housing included.
Perforation Blade – Basic

The Perforation Blade is a fun, novelty blade that cuts projects using a uniform perforated line. This is prefect for projects that you want a tear finish on like coupons or raffle tickets.
It cuts projects with 2.5mm teeth and leaves 0.5mm gap of material. The blade is labeled with an 11 on the side.
Similar to the Rotary Blade designs smaller than 3/4″ are not recommended with this blade. Cricut also doesn’t recommend multiple passes/cuts since you can’t guarantee the perforations will line up on a second pass.
Paper products like cardstock and poster board are most recommended for use with the Perforation Blade. Cricut has a full list of materials they have tested with this blade here.
The Perforation Blade is available on the Cricut website and can be purchased as just the Perforation Blade or with the QuickSwap Housing included.
Wavy Blade
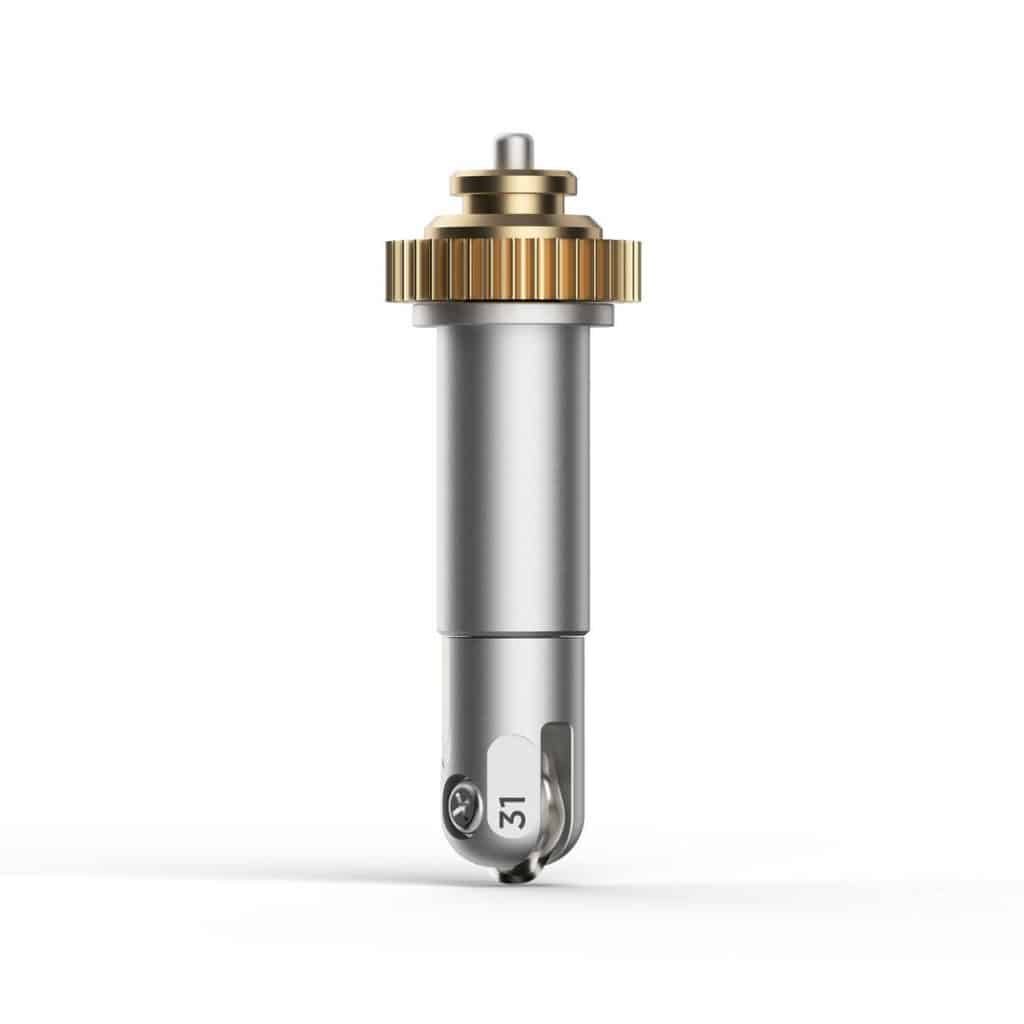
The Wavy Blade is a decorative blade that produces a wavy effect when it cuts. It adds a fun wavy effect to your project that is much faster than trying to add a wavy edge manually.
It’s a stainless steel rotary blade that creates a wave that is 2mm long and 0.8mm high. The blade is labeled with a 31 on the wide.
As has been the case with the other rotary style blades, it isn’t recommended to cut designs smaller than 3/4″. Also since the blade cuts a wave, the blade will do a slight over cut so intricate design are also not recommened.
You can use a ton of different materials with the Wavy Blade like cardstock, vinyl and iron on. Check out all the materials Cricut has tested with this blade here.
The Wavy Blade is available on the Cricut website and can be purchased as just the Wavy Blade or with the QuickSwap Housing included.
Cricut Maker – Software
All Cricut cutting machines use the same free proprietary software, Cricut Design Space. It’s a downloadable program but you do need an internet connection available every time you start the software. This is so Design Space can connect to your Cricut account and access any designs, projects or subscriptions you have like Cricut Access.
Design Space is compatible with Windows and Mac computers, as well as iOS and Android devices in the format of an app. Unfortunately does not work with Chromebooks.
The software is easy enough for beginners to figure out, yet sophisticated enough to give advanced users more freedom when it comes to using their own designs. You can also import different file formats for free (.JPG /.BMP /.PNG, .GIF /.SVG / .DXF) and then convert them into cuttable shapes.
Learn more about Cricut Design Space in my article. If SVGs are new to you I’ve answered some of the most common questions about this file type in my article, SVG File Format: 21 Common Questions.
Cricut Maker – What’s in the box
When you first start looking at buying a Cricut Maker you’ll see a few options available to you on the Cricut website. If you decide to just purchase the Cricut Maker on it’s on, meaning not in a bundle you’ll find the following items in the box
- Cricut Maker machine
- Rotary blade + Drive Housing
- Premium Fine Point pen + Housing
- Two 12-inch × 12-inch cutting mats (FabricGrip mat and LightGrip mat)
- Fine Point Black pen
- USB cable
- Power adapter
- Materials for a practice project (these are just a little teaser)
It’s enough to get you excited about your new machine but unless you have a horde of cardstock from old scrapbooking projects you’ll need to buy some materials and a few other tools as well. That’s why I recommend going for one of the bundles since they give you more bang for you buck.
At the time of writing there were 4 bundles available on Cricut.com, the Scoring Bundle, the Basic Tools Bundle, the Essentials Bundle, and the Everything Materials Bundle. I’m not going to go into too much detail on what is included with each bundle since Cricut likes to them up.
The Everything Materials Bundle will give you the best value but it is the most expensive. Have close look at what each bundle includes and see if it’s what you thnk you want or need.
I personally bought the Everything Materials Bundle and I got a ton of different vinyl and iron-on but even a few months later the bundle has changed and I’m a little jealous.
Cricut Maker – Warranty and Maintenance
Cricut offers a 1-year warranty on the Maker starting at the date of purchase. However, this warranty is only valid if you buy from authorized resellers, which includes Amazon and the Cricut website if you order your machine online.
As for maintenance, you won’t have to do much besides switching out the cutting blades, cutting mats, and other tools every so often. Also, make sure you clean the machine from debris after cutting to keep it in top condition. Using compressed air is the easiest way to do this.
Cricut Maker – Pros
- Creates professional and detailed cuts
- Rotary blade delivers an excellent cutting power
- Considering its advanced features, it’s quite a bargain under $400
- Equipped with a turbocharged engine and cutting-edge engineering
- Has a sleek, minimalist design that’ll never go out of style
- Can detect whether or not you’re working with the right blade
- Has an expanding list of tools and blades
- Can cut over 300 different materials
Cricut Maker – Cons
- The cutting space can be wider
- The main package doesn’t include the Knife blade (sold separately)
- Most tools are not included
- Limited to a maximum cutting size of 11.5″x 23.5″
- Cannot perform matless cutting
Where Can I Buy the Cricut Maker?
The two best places to purchase the Cricut Maker are Amazon and the official Cricut Website, both of which often have sales. But I do prefer to buy directly from the Manufacturers website. You can usually get free shipping from Cricut, just check my sidebar for the latest code.
Final Thoughts
The Cricut Maker smart cutting machine offers exceptional cutting power and versatility that’s superior to any other of its sibling machines. The Maker allows you to switch easily between tools, use two tools at once, and import a huge range of design files for cutting in no time.
So, if you’re a serious craft hobbyist who enjoys creating unique projects and learning new techniques, then you’ll definitely benefit from the range of high-quality individual tools compatible with the Maker, as well as the increased power and flexibility in using them.
